LCM Kitchen Remodel
 A satisfying look at a ceiling corner
In 2022 we started planning to remodel the kitchen in our West Seattle home. In June 2024 we completed our project. We ended up going with LCM Design and Build. We got the referral to LCM from Home Owners Club. We had already updated appliances. The project included:
- Smallish 145 square foot kitchen
- Custom cabinets including a built-in breakfast nook
- Quartz Countertop
- Tile backsplash
- LVP flooring
- New lights, switches, outlets
- New paint
- About 7 weeks of work compared to 6 week estimate
- Total cost $73,762 ($508/sq ft) compared to $69,000 estimate (excluding appliances)
We are very pleased with the results and highly recommend LCM. Home Owners Club is also good, I’d recommend them too.
Choosing LCM
After searching on our own for months, we got fairly bad responses from contractors. Most never responded. Some were booked out two years. Some said they weren’t interested in the project.
We ended up with three or four superficial bids that spanned a 10x range in price. We actually started with a different contractor for some fixit work elsewhere in the house. Long story short: this was a frustrating process with terrible communication. We got partway through an unsatisfying kitchen design and canceled the project. This was back in 2022 and early 2023.
A friend connected us with Home Owners Club (HOC) in late 2023. HOC is a local repair and contracting referral company. They gave us three kitchen referrals, in addition to some unrelated exterior painting and concrete referrals. All were friendly and knowledgeable. They all came on site for a walkthrough and got bids back to us in a week or so. All of the bids included custom cabinets and were within 30% of each other. All were $400-$600/sq ft. LCM was the middle cost of the three bids.
We picked LCM because we liked the in-person experience: the owners, brothers Liviu (cabinets) and Marius (project management), came on-site. They were enthusiastic and detailed. They build their own cabinets. All their business materials are very polished: design, itemized estimate, website, business cards. Communication was probably our #1 priority and we felt LCM had the best communication; they did a good job of listening to what we wanted, but also giving advice and options we hadn’t thought of, since they have experience and expertise that we don’t.
LCM has great staff. In addition to Liviu and Marius, we worked with Kalia from the cabinet shop and Joe who worked on-site, among other folks. Counters, tiles and paint were all handled by subcontractors that LCM clearly uses regularly. Everyone was friendly and helpful. They all had great attitudes, produced good work, were attentive to details, and all seemed like they actually wanted to be there.
HOC handled all of the billing. They’d call us up every few weeks when LCM invoiced them. We never had to get them more involved, but I bet we could have if something wasn’t right. They’d invoice us about a week after LCM invoiced them. FWIW, they assure us that their cut came from LCM and didn’t increase our price.
Results
Here are the final results. We’re still working on a few things — some wall décor, a new doormat. But all the construction, touch-ups, etc. are complete. More details below.
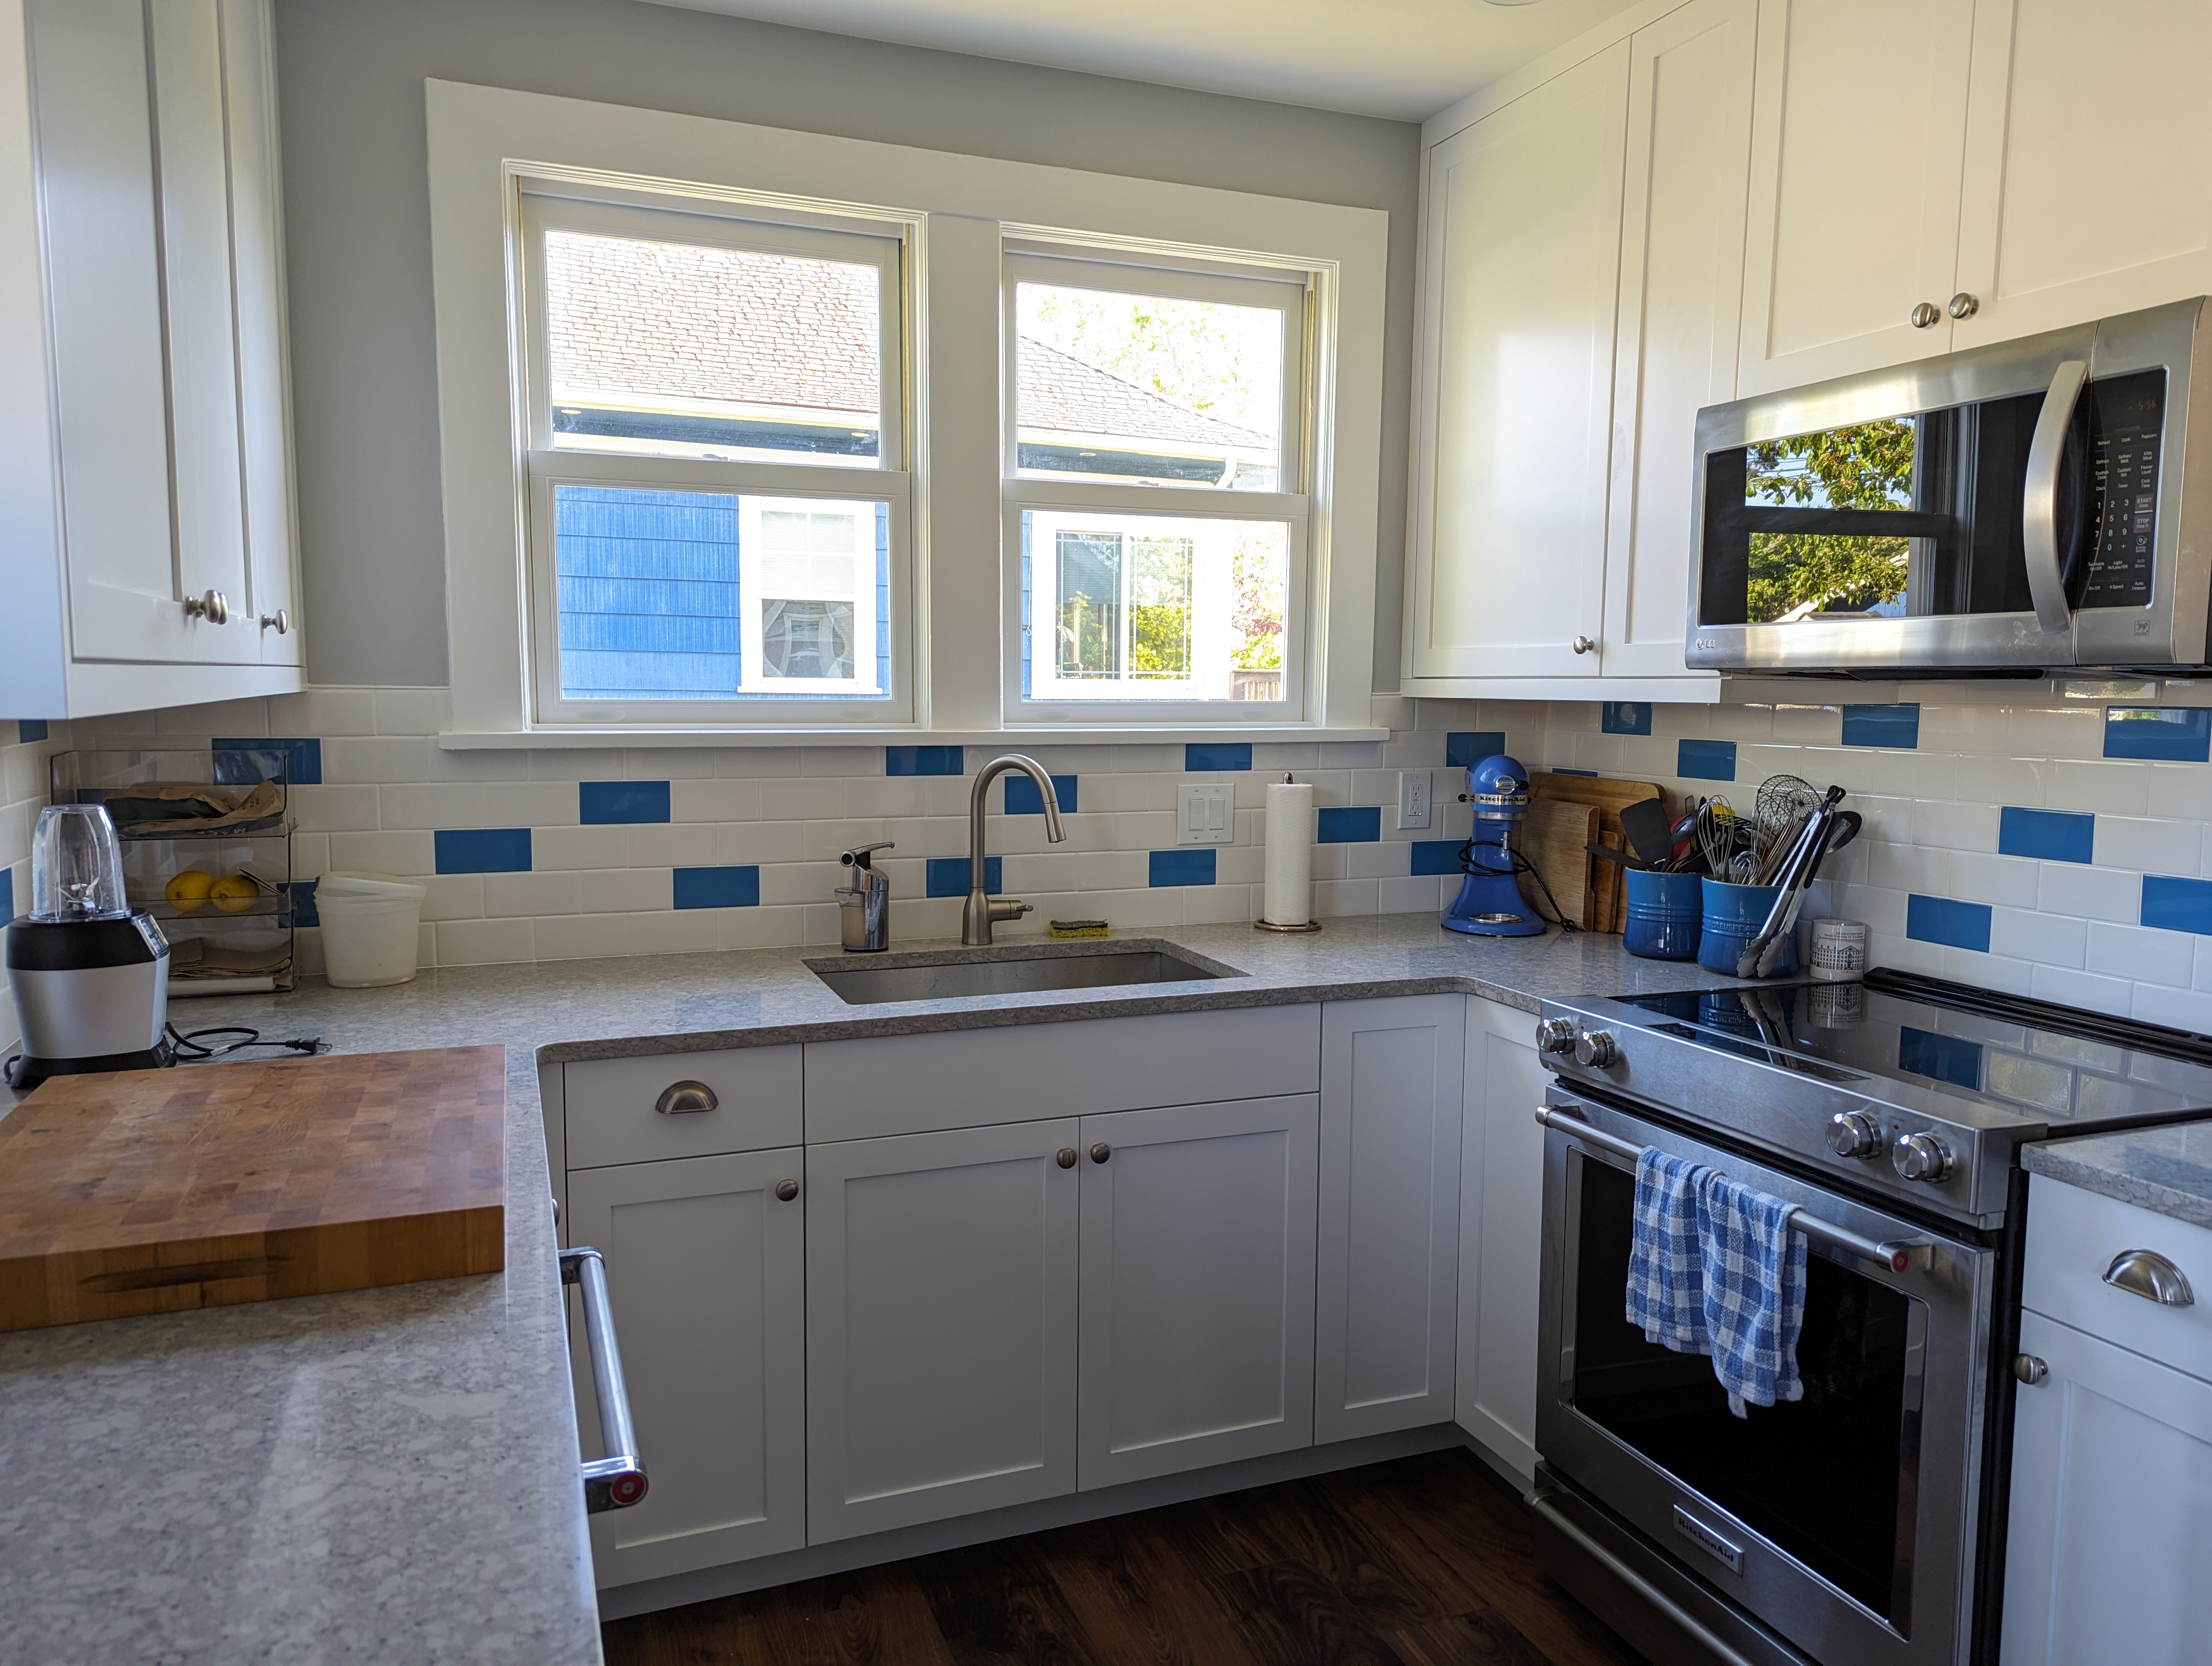 Facing south, sink, stove, dishwasher. The fridge is just to the right, out of
frame
Facing south, sink, stove, dishwasher. The fridge is just to the right, out of
frame
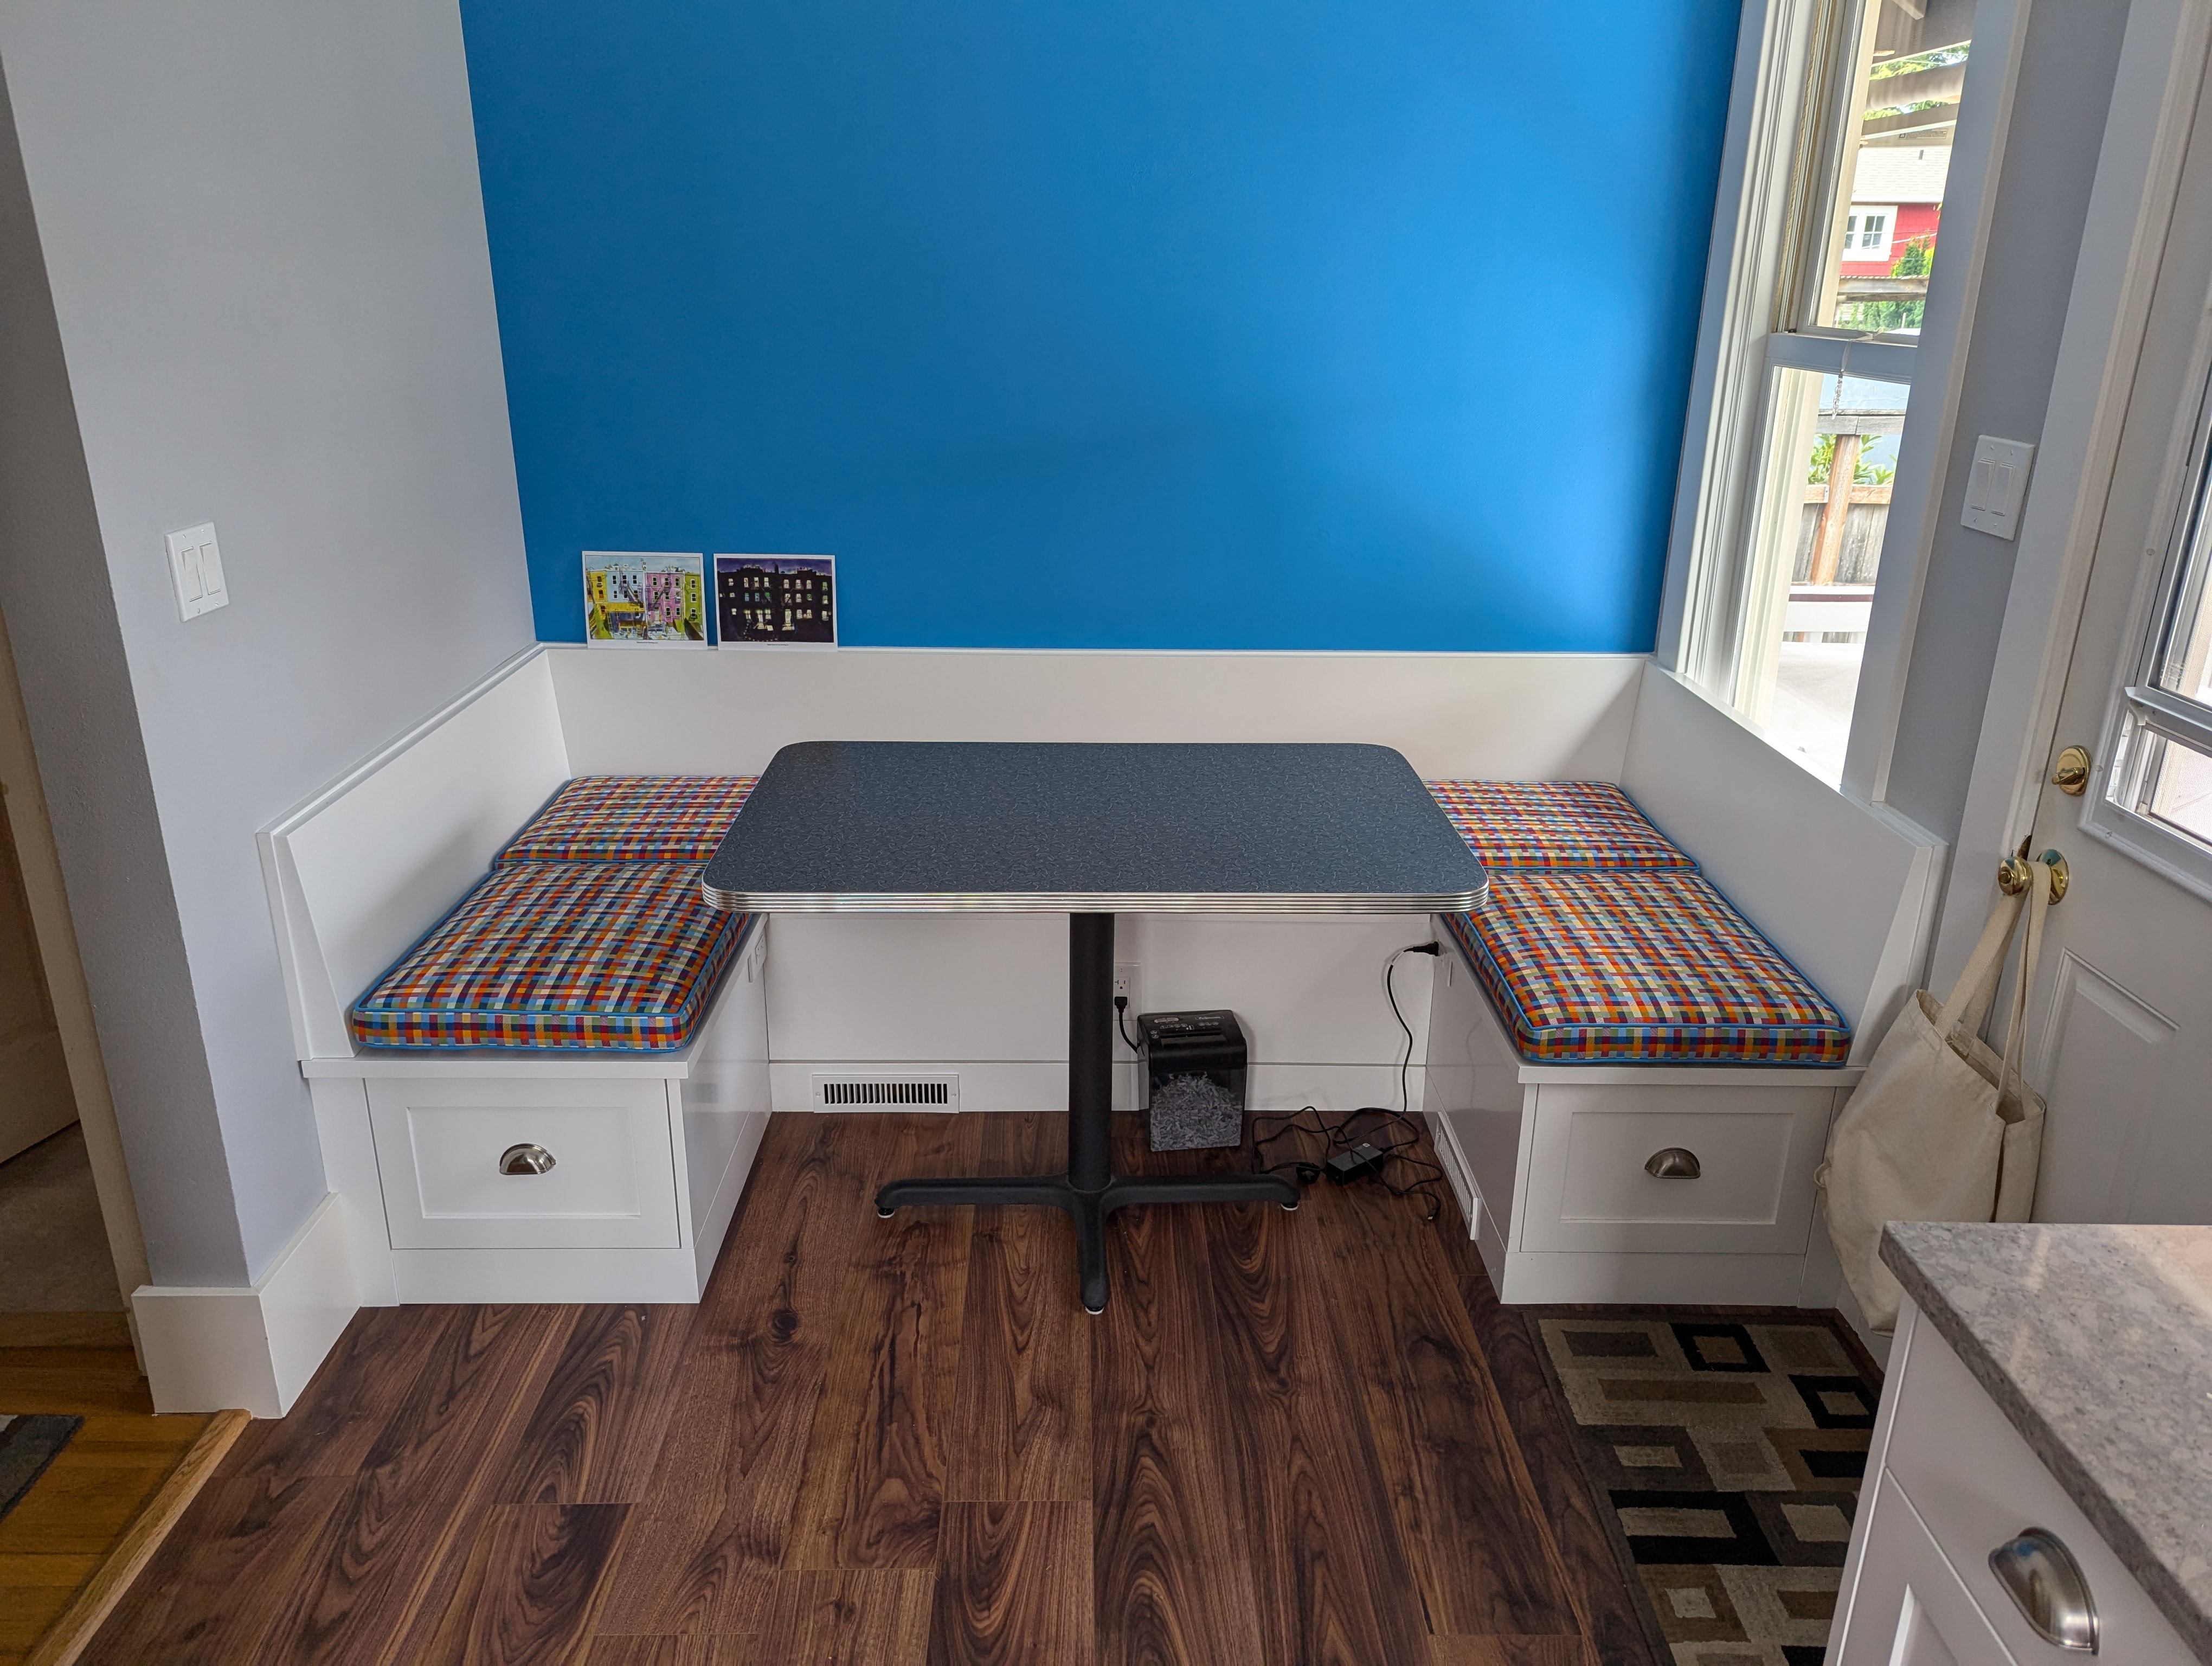 Facing north, breakfast nook. Interior hallway to left, exterior door to
right. The fridge is to the left
Facing north, breakfast nook. Interior hallway to left, exterior door to
right. The fridge is to the left
The original kitchen, along with the rest of the house was updated in the mid 2000’s. We bought the house in the late 2000’s. We love the neighborhood (West Seattle’s Admiral neighborhood). And we love the house, but wanted an update. We especially wanted to brighten the kitchen up. Here are some before photos.
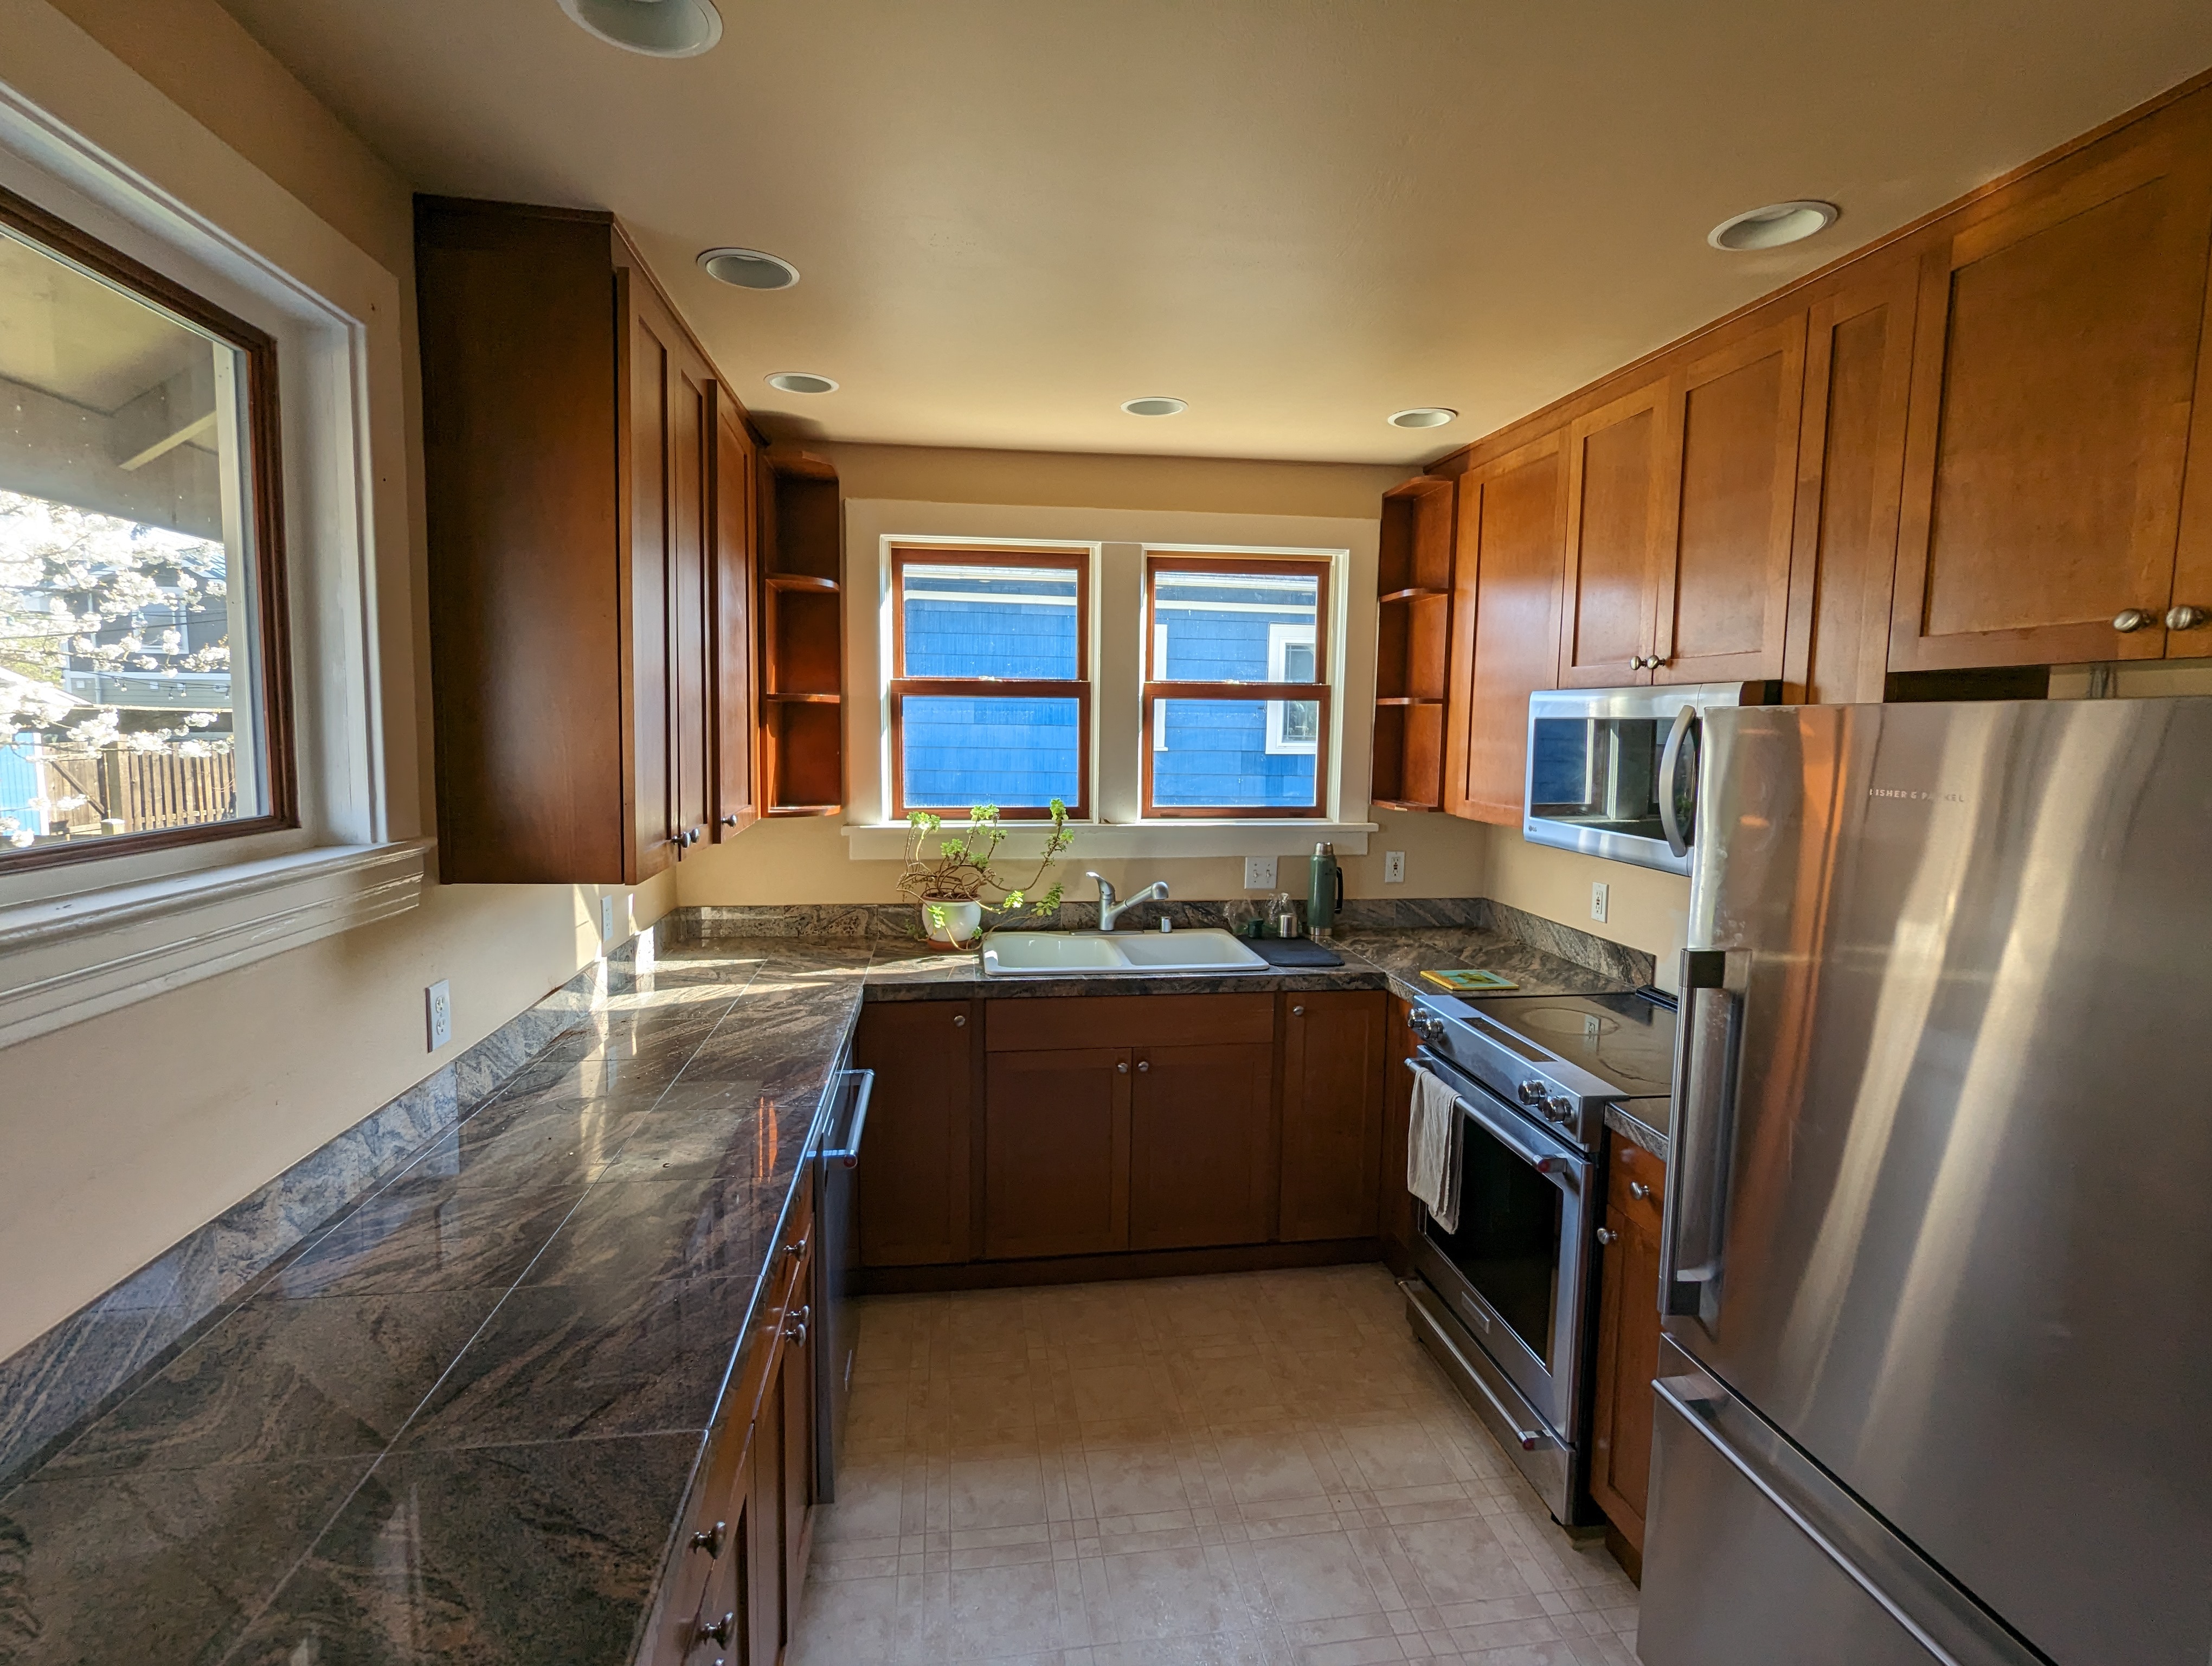 Facing south, same appliances, different sink, different light fixtures (same
cans)
Facing south, same appliances, different sink, different light fixtures (same
cans)
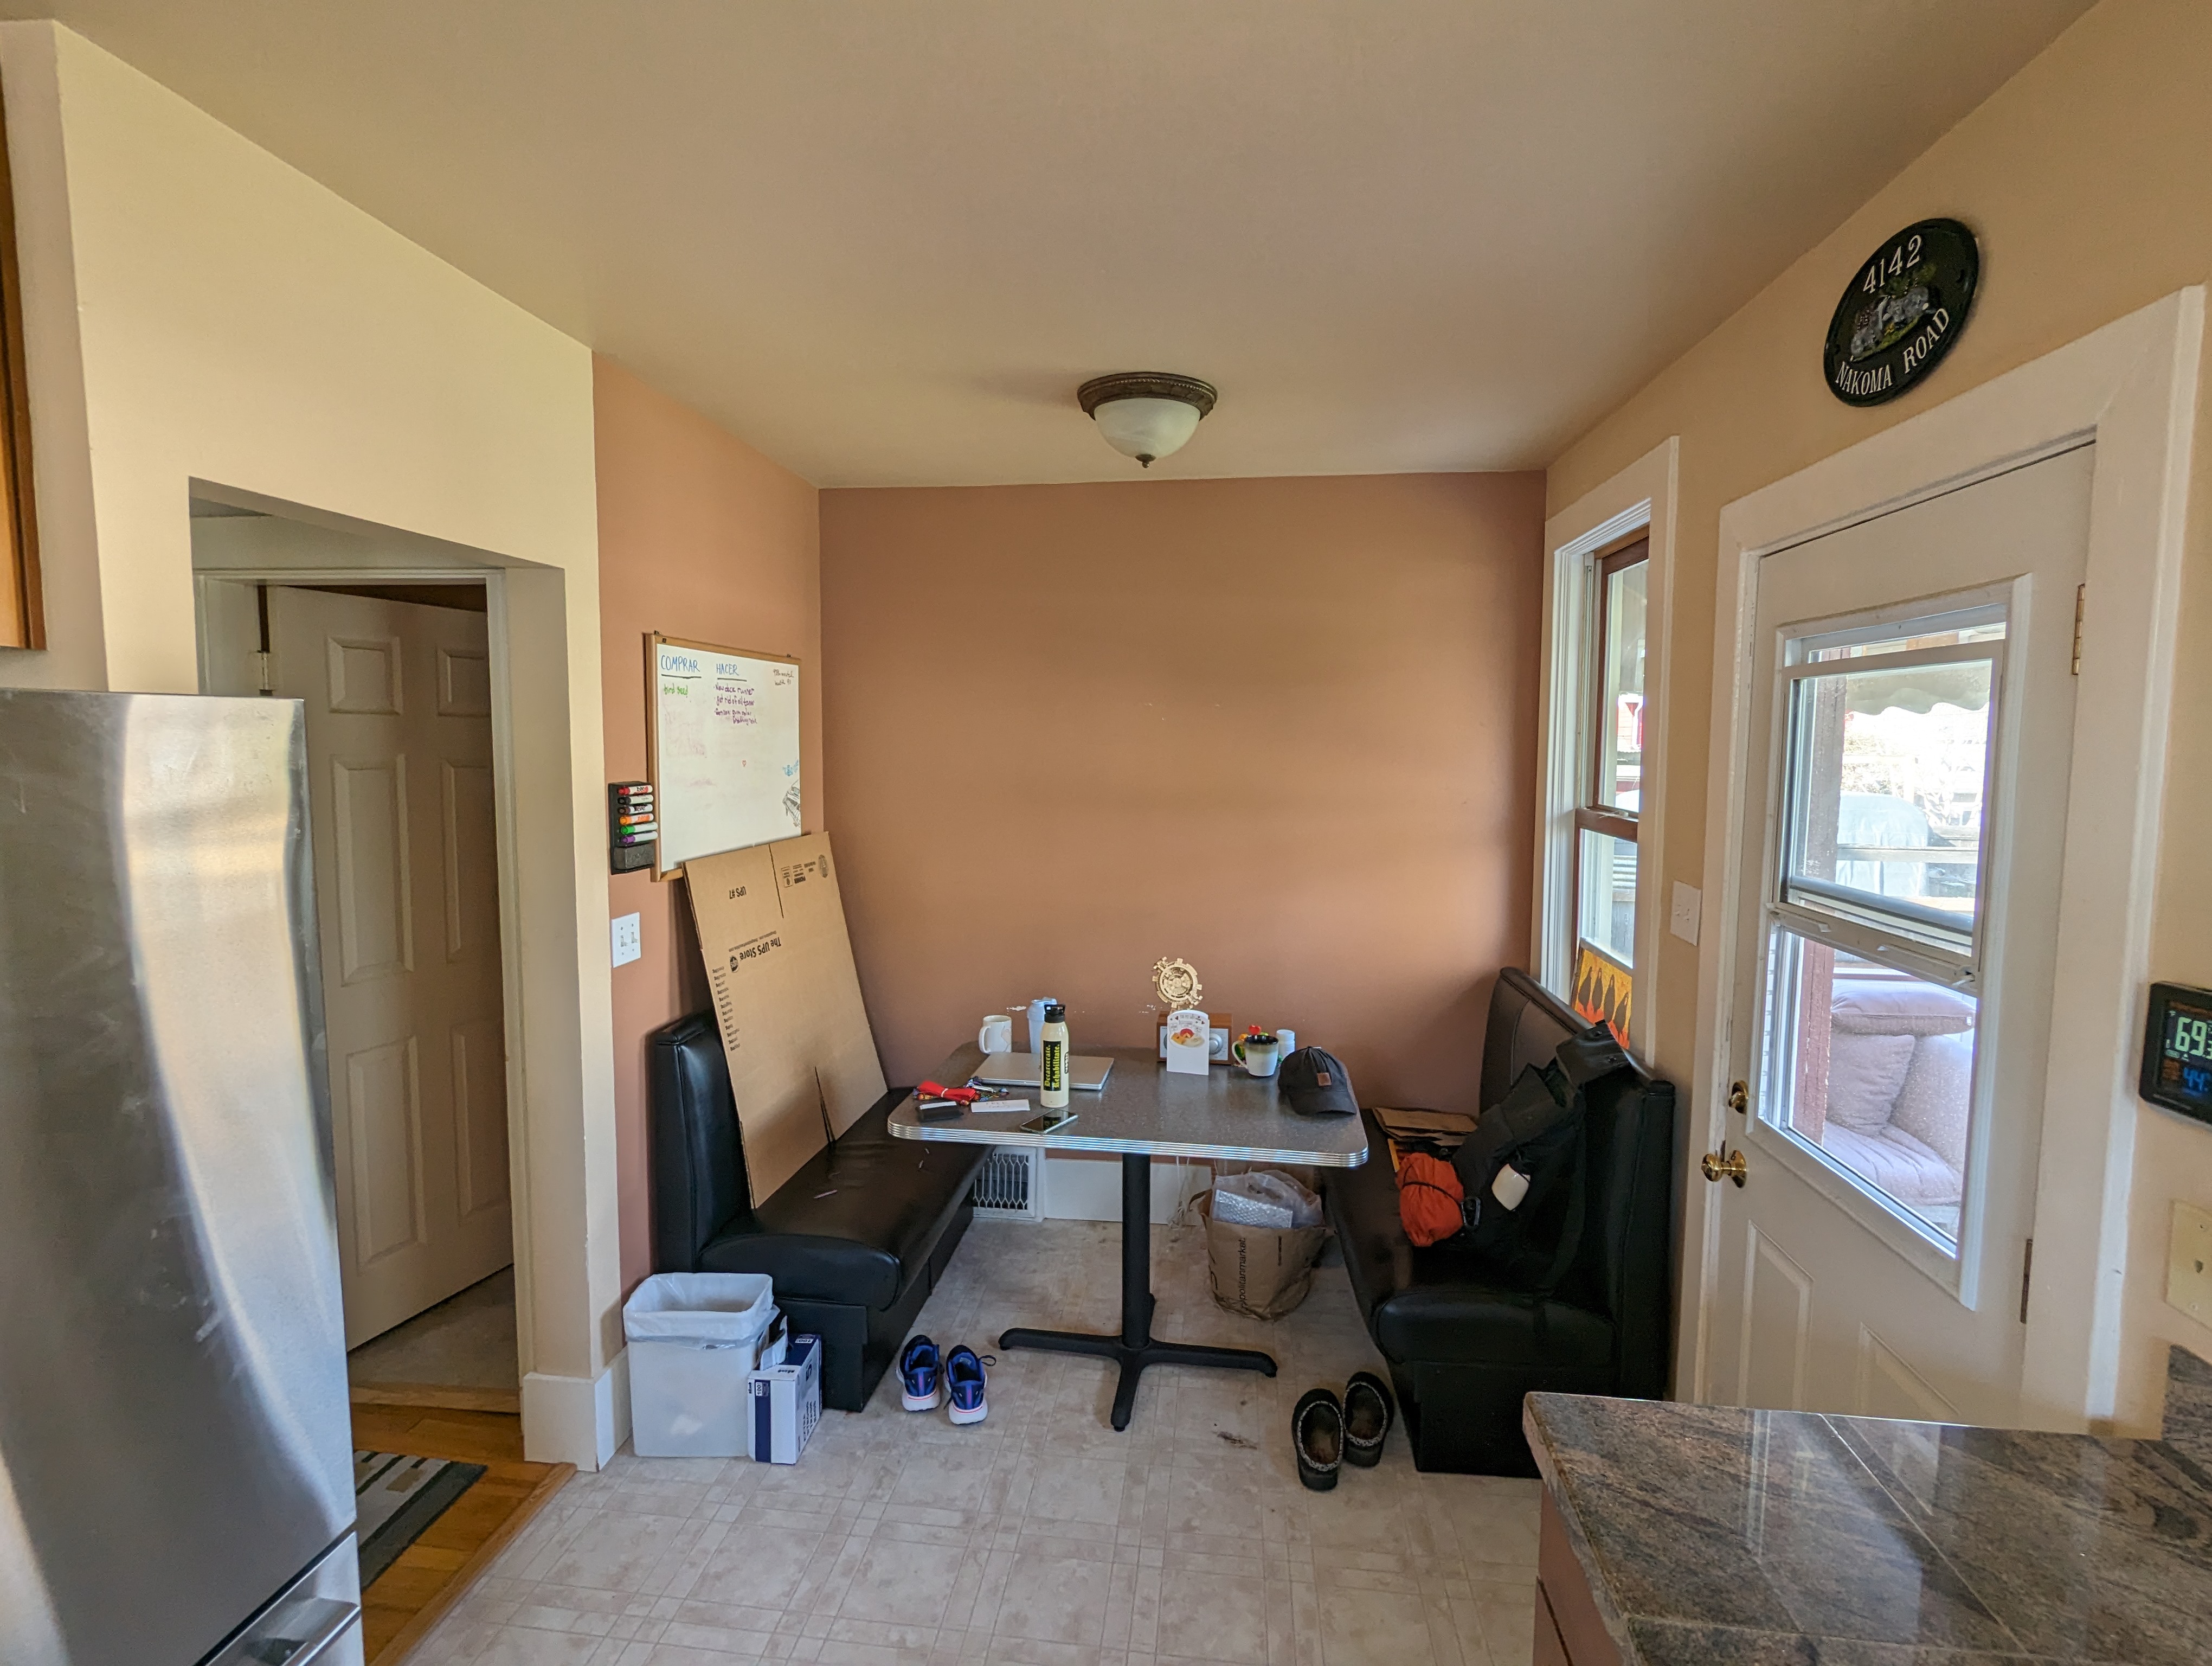 Facing north, diner booth instead of built-in breakfast nook. Different light
fixture
Facing north, diner booth instead of built-in breakfast nook. Different light
fixture
Design
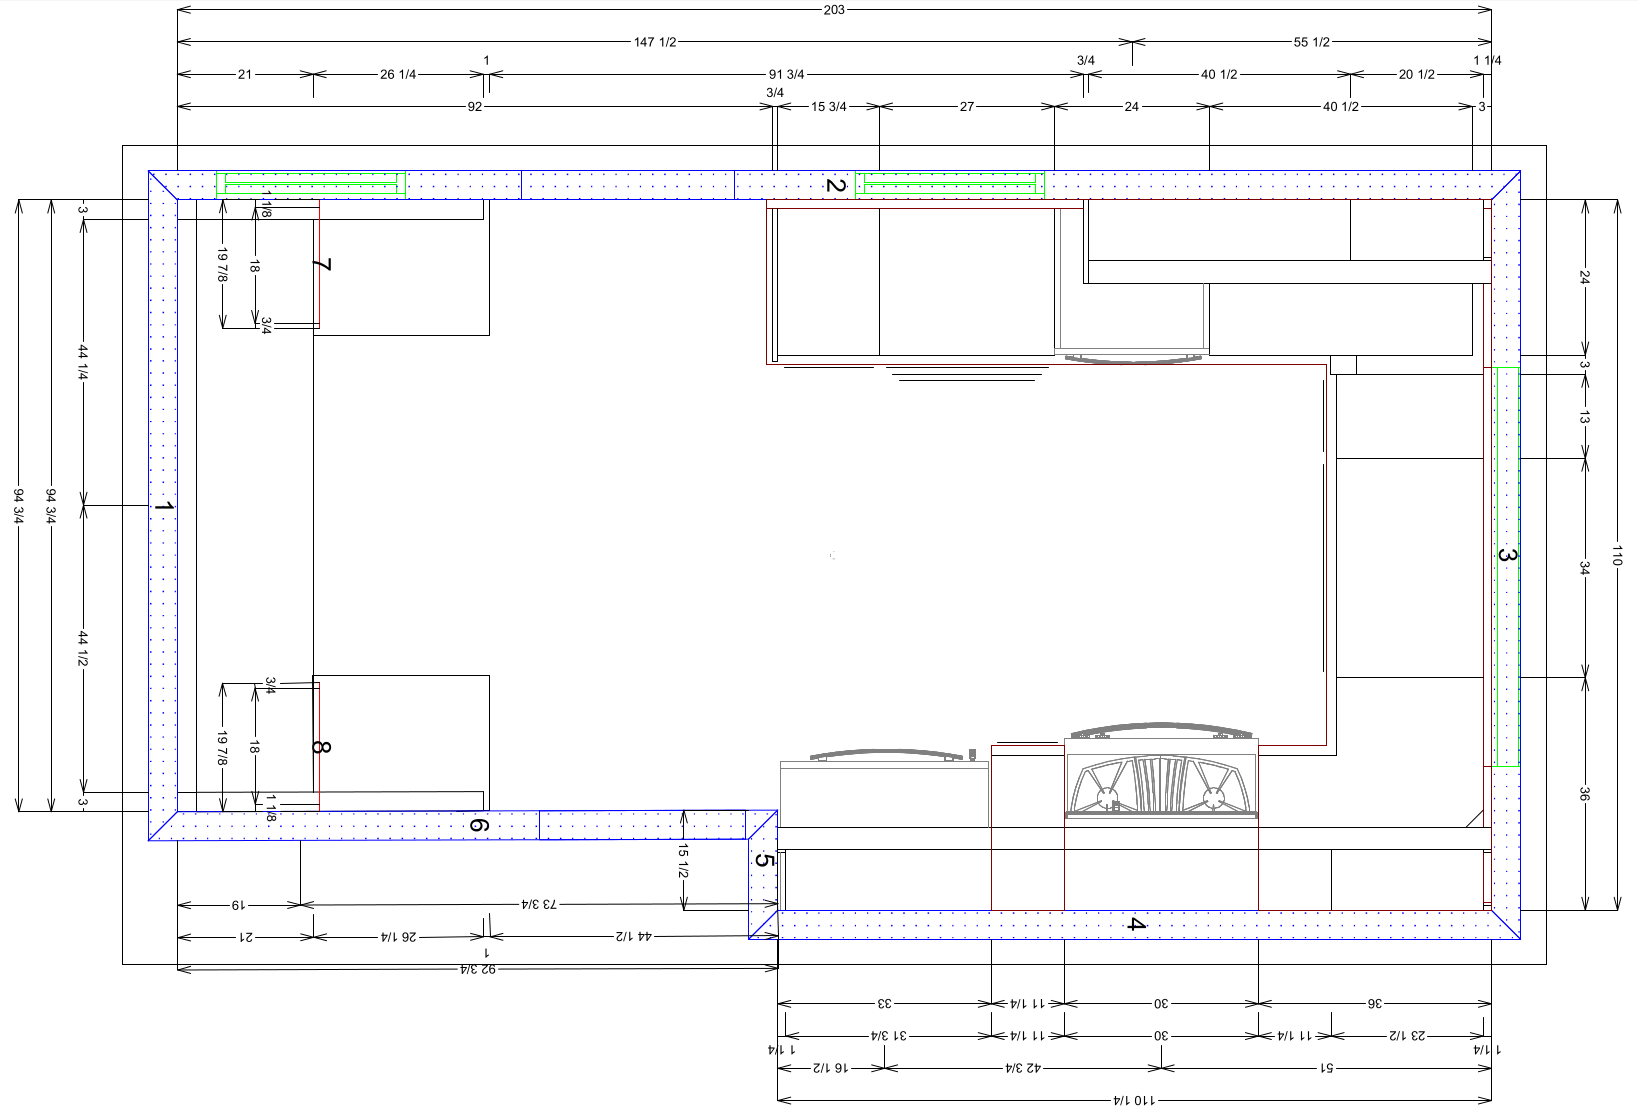 Floorplan of our updated kitchen
This is one page from a six-page design LCM put together for us after some back and forth over email. This is in addition to the itemized estimate we got. We put together a design slide deck with our design thoughts and shared that with LCM before we got the design. Marius said he wishes every client had a design deck.
To build that design deck we just did a lot of googling, Pinterest boards, etc. We also visited Contract Furnishing Mart and a few other showrooms in SoDo. We picked out most of the materials there: flooring, countertop, tiles. A visit to Seattle Lighting got us the light fixture over the nook. Marius suggested we retrofit the can lights with LED lights. We got paint from Sherwin Williams during week two of construction, just in time for painting. Material/color details are in the deck.
LCM has a custom cabinet shop which is run as a separate business. After sharing our design deck, Liviu/Marius taking measurements and getting an initial estimate, we went in for a meeting with Kalia at the cabinet shop in Monroe. She walked us through specifics: pull-outs, lazy Susan, “cloud” corner pull-out, door styles, finish, etc. Kalia did a great job showing us samples and helping us make choices. She didn’t have a referral or recommendation on cushions for the seating area, which would have been helpful. We ended up ordering from Calico in Bellevue.
A few highlights of the design:
- Drawer joints are dovetails. Interiors are all a beautiful blond veneer over plywood which looks great with the white exterior.
- LCM suggested the built-in booth. It has lift-up seats for storage along the back, and two drawers on the sides which we use for shoes, since this is the main door we use to enter/exit the house.
- We added pullouts to the top cabinet in the corner near the microwave. This makes getting into it much easier for anyone under 6’ tall (i.e., my wife).
- We have drawers for the biggest bottom cabinet next to the dishwasher. We’re storing mixing bowls and baking dishes in those.
- We put pullouts in our “junk” cabinet. It’s nice to not have to stoop and dig around for random stuff.
- We put pullouts in the narrow cabinet to the left of the sink where we store flour, sugar, and other dry goods.
- In the blind corner to the left of the sink we’ve got a “cloud” pullout. We had mixed feelings about it at first; it makes use of maybe 60% of the space and is oddly shaped; a 13x9” baking pan couldn’t fit anywhere on it. But it is actually pretty convenient for accessing things that do fit.
- In the blind corner to the right of the sink we’ve got a lazy Susan. This is similar to what we had before, but now it’s a custom-made cabinet with dovetails and other nice touches.
- We asked for extra shelves for all the top cabinets. We can’t reach all those shelves without a step stoop, but it’s nice actually use that vertical space. No charge for these.
Construction
Marius told us to plan for 6 weeks, but he hoped they’d be done in 4 or 5. He was in touch in-person, by phone, email or text almost every day with updates. Workers always showed up when they said they would, a nice change from multiple no shows or showing up without notice from the previous company we worked with.
Joe did most of the on-site work and talked through his work with us every day he was there. When questions and choices that came up, either Marius or Joe walked us through the options. They called out any extra costs including roughly how much. The subcontractors were similarly friendly and helpful. I especially appreciated how they offered the “workaround” solutions vs. the full (“more expensive, but let’s do it right”) solutions. I think we went with full solutions in almost every case and the total cost only ended up being 8% more than the estimate.
Construction started on time. It seemed 80% finished in the first 2 weeks: demolition, cabinet installation, flooring. Countertops, tiles, painting, sink installation, new electrical outlets all took another 2 weeks. Appliance installation and final details, touch-ups, and fixing a few issues took another 2-3 weeks. So it was about 7 weeks total, but we were moved back in and using the kitchen by the end of week 5.
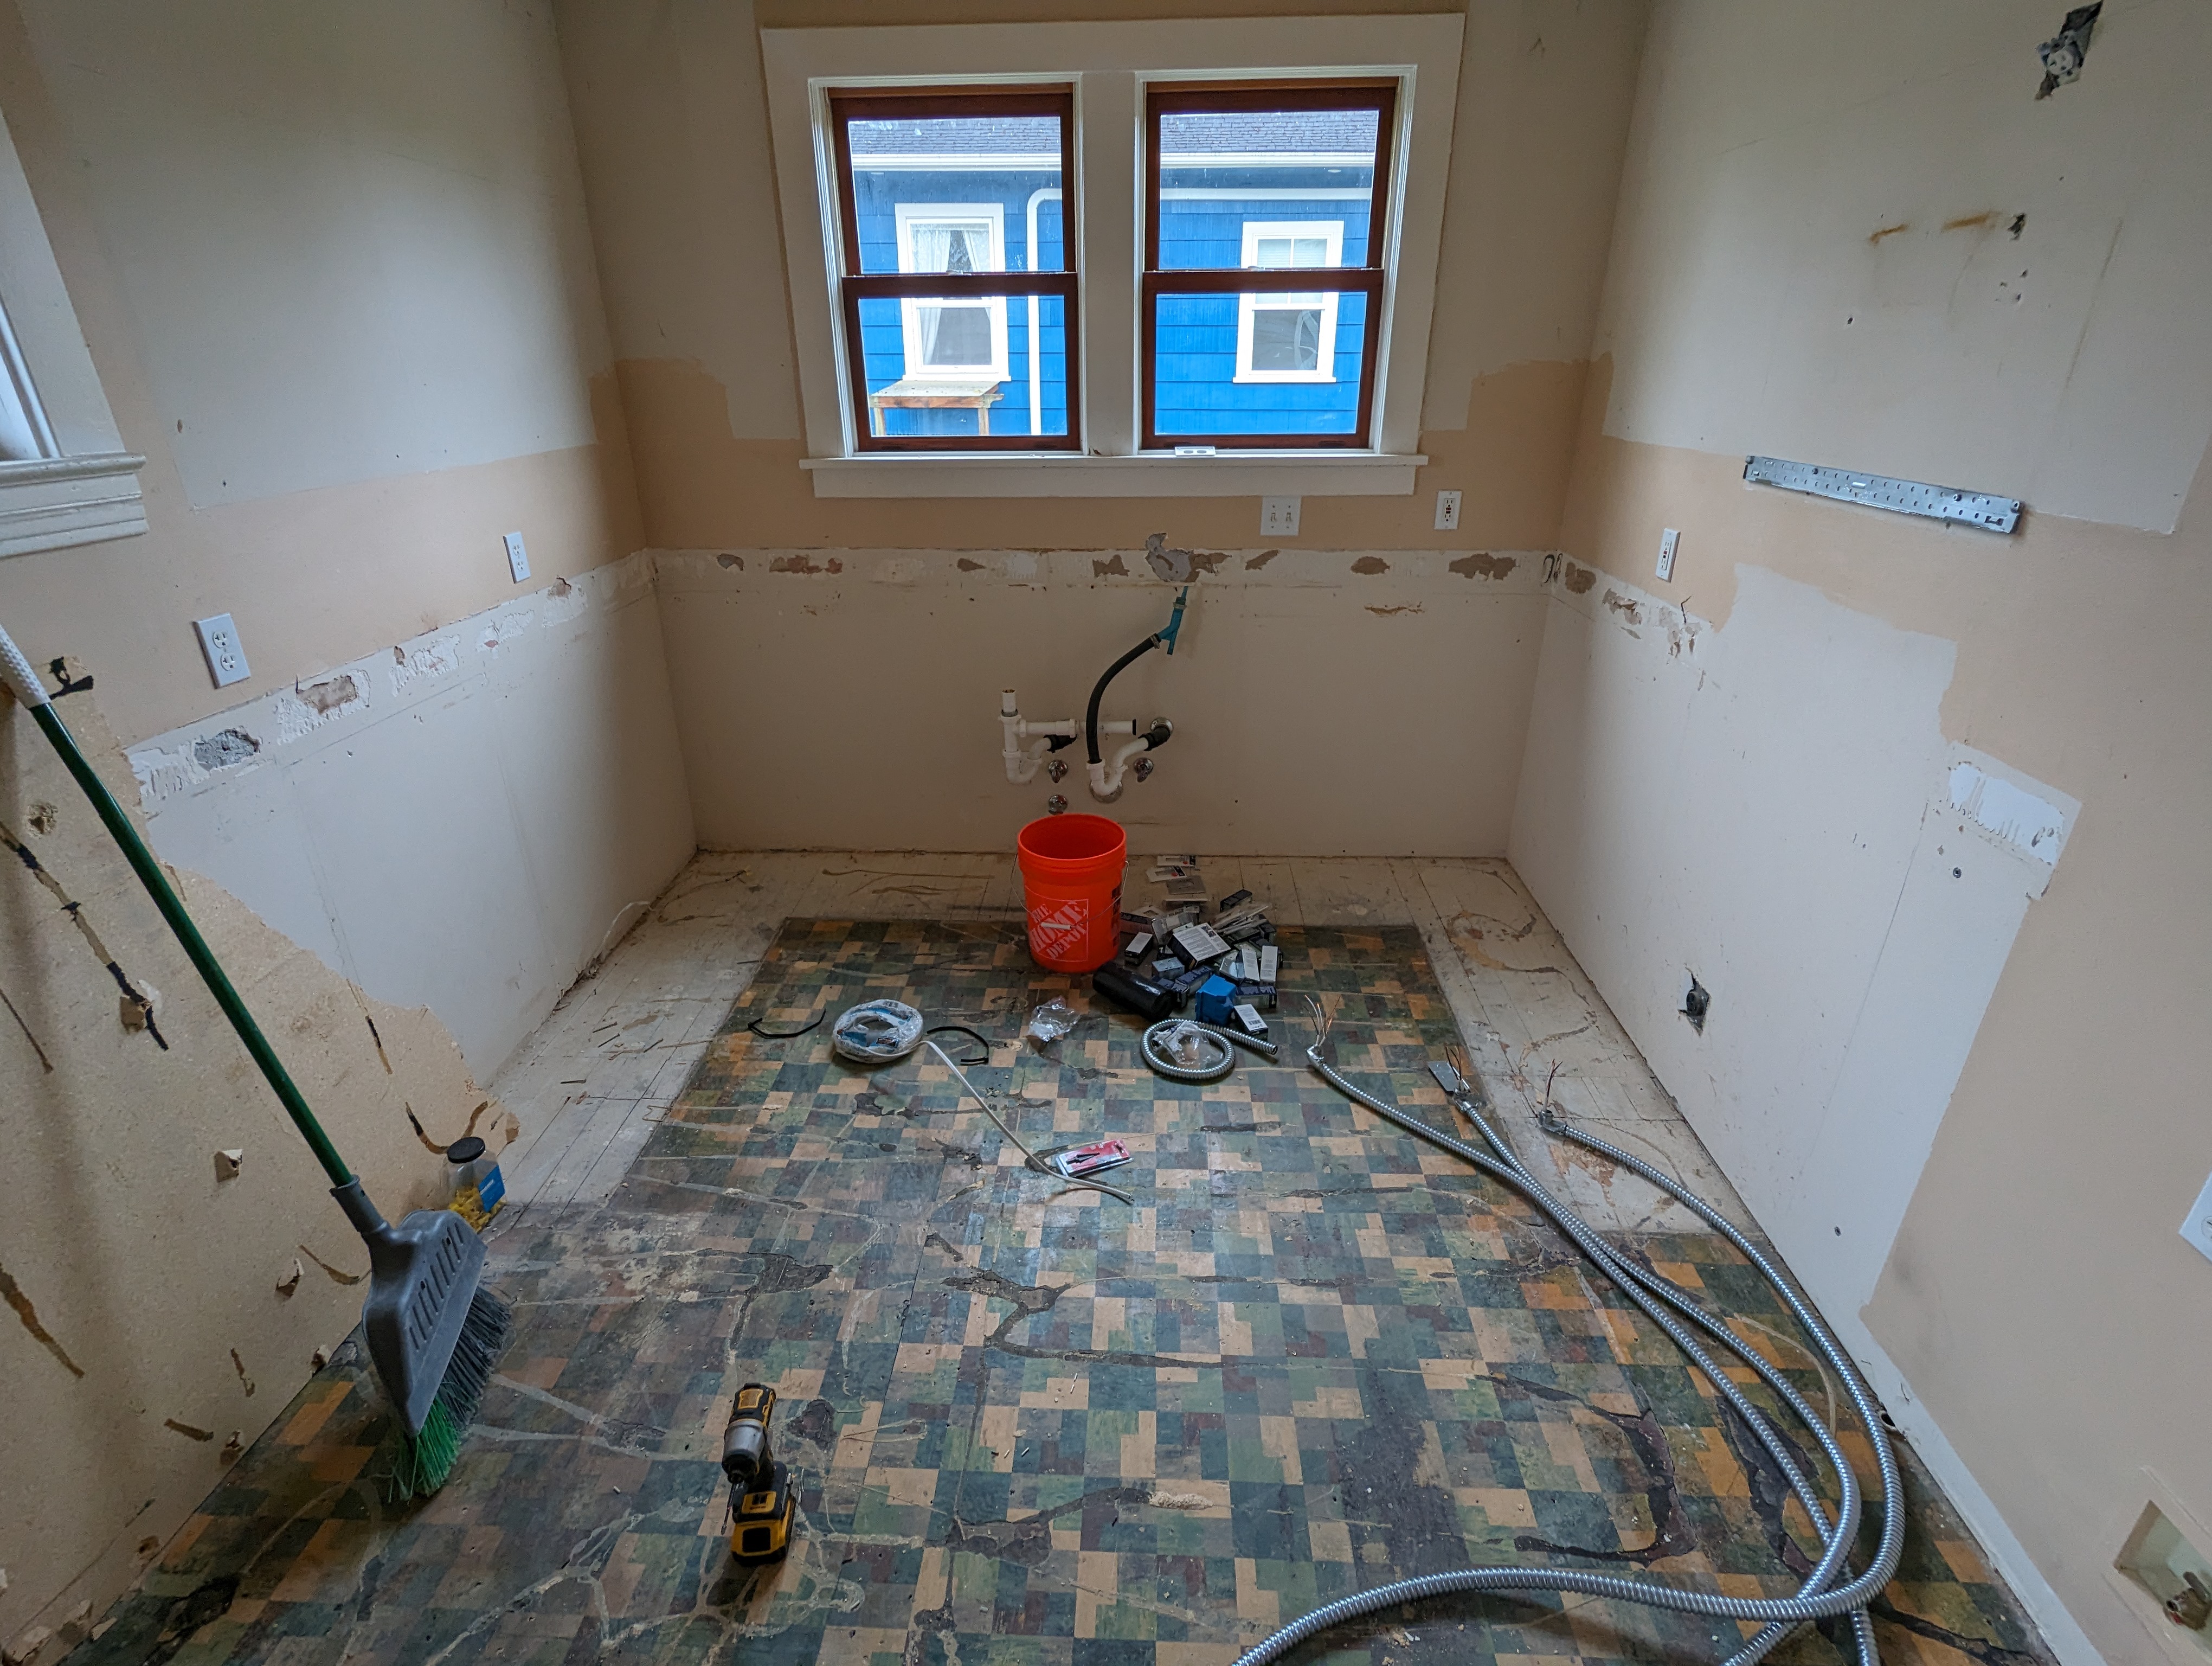 Post-demo sink area
The flooring you see was underneath a sheet of MDF that was glued and nailed down. Joe spent most of a day trying to pull that up. He said the flooring underneath was a membrane-style flooring, sort of like tar paper. He had to lay some extra padding underneath the flooring, which was a few hundred dollars of extra cost.
No asbestos or other “can of worms” got opened up during the demo, fortunately. That plumbing looks a little weird, though — foreshadowing!
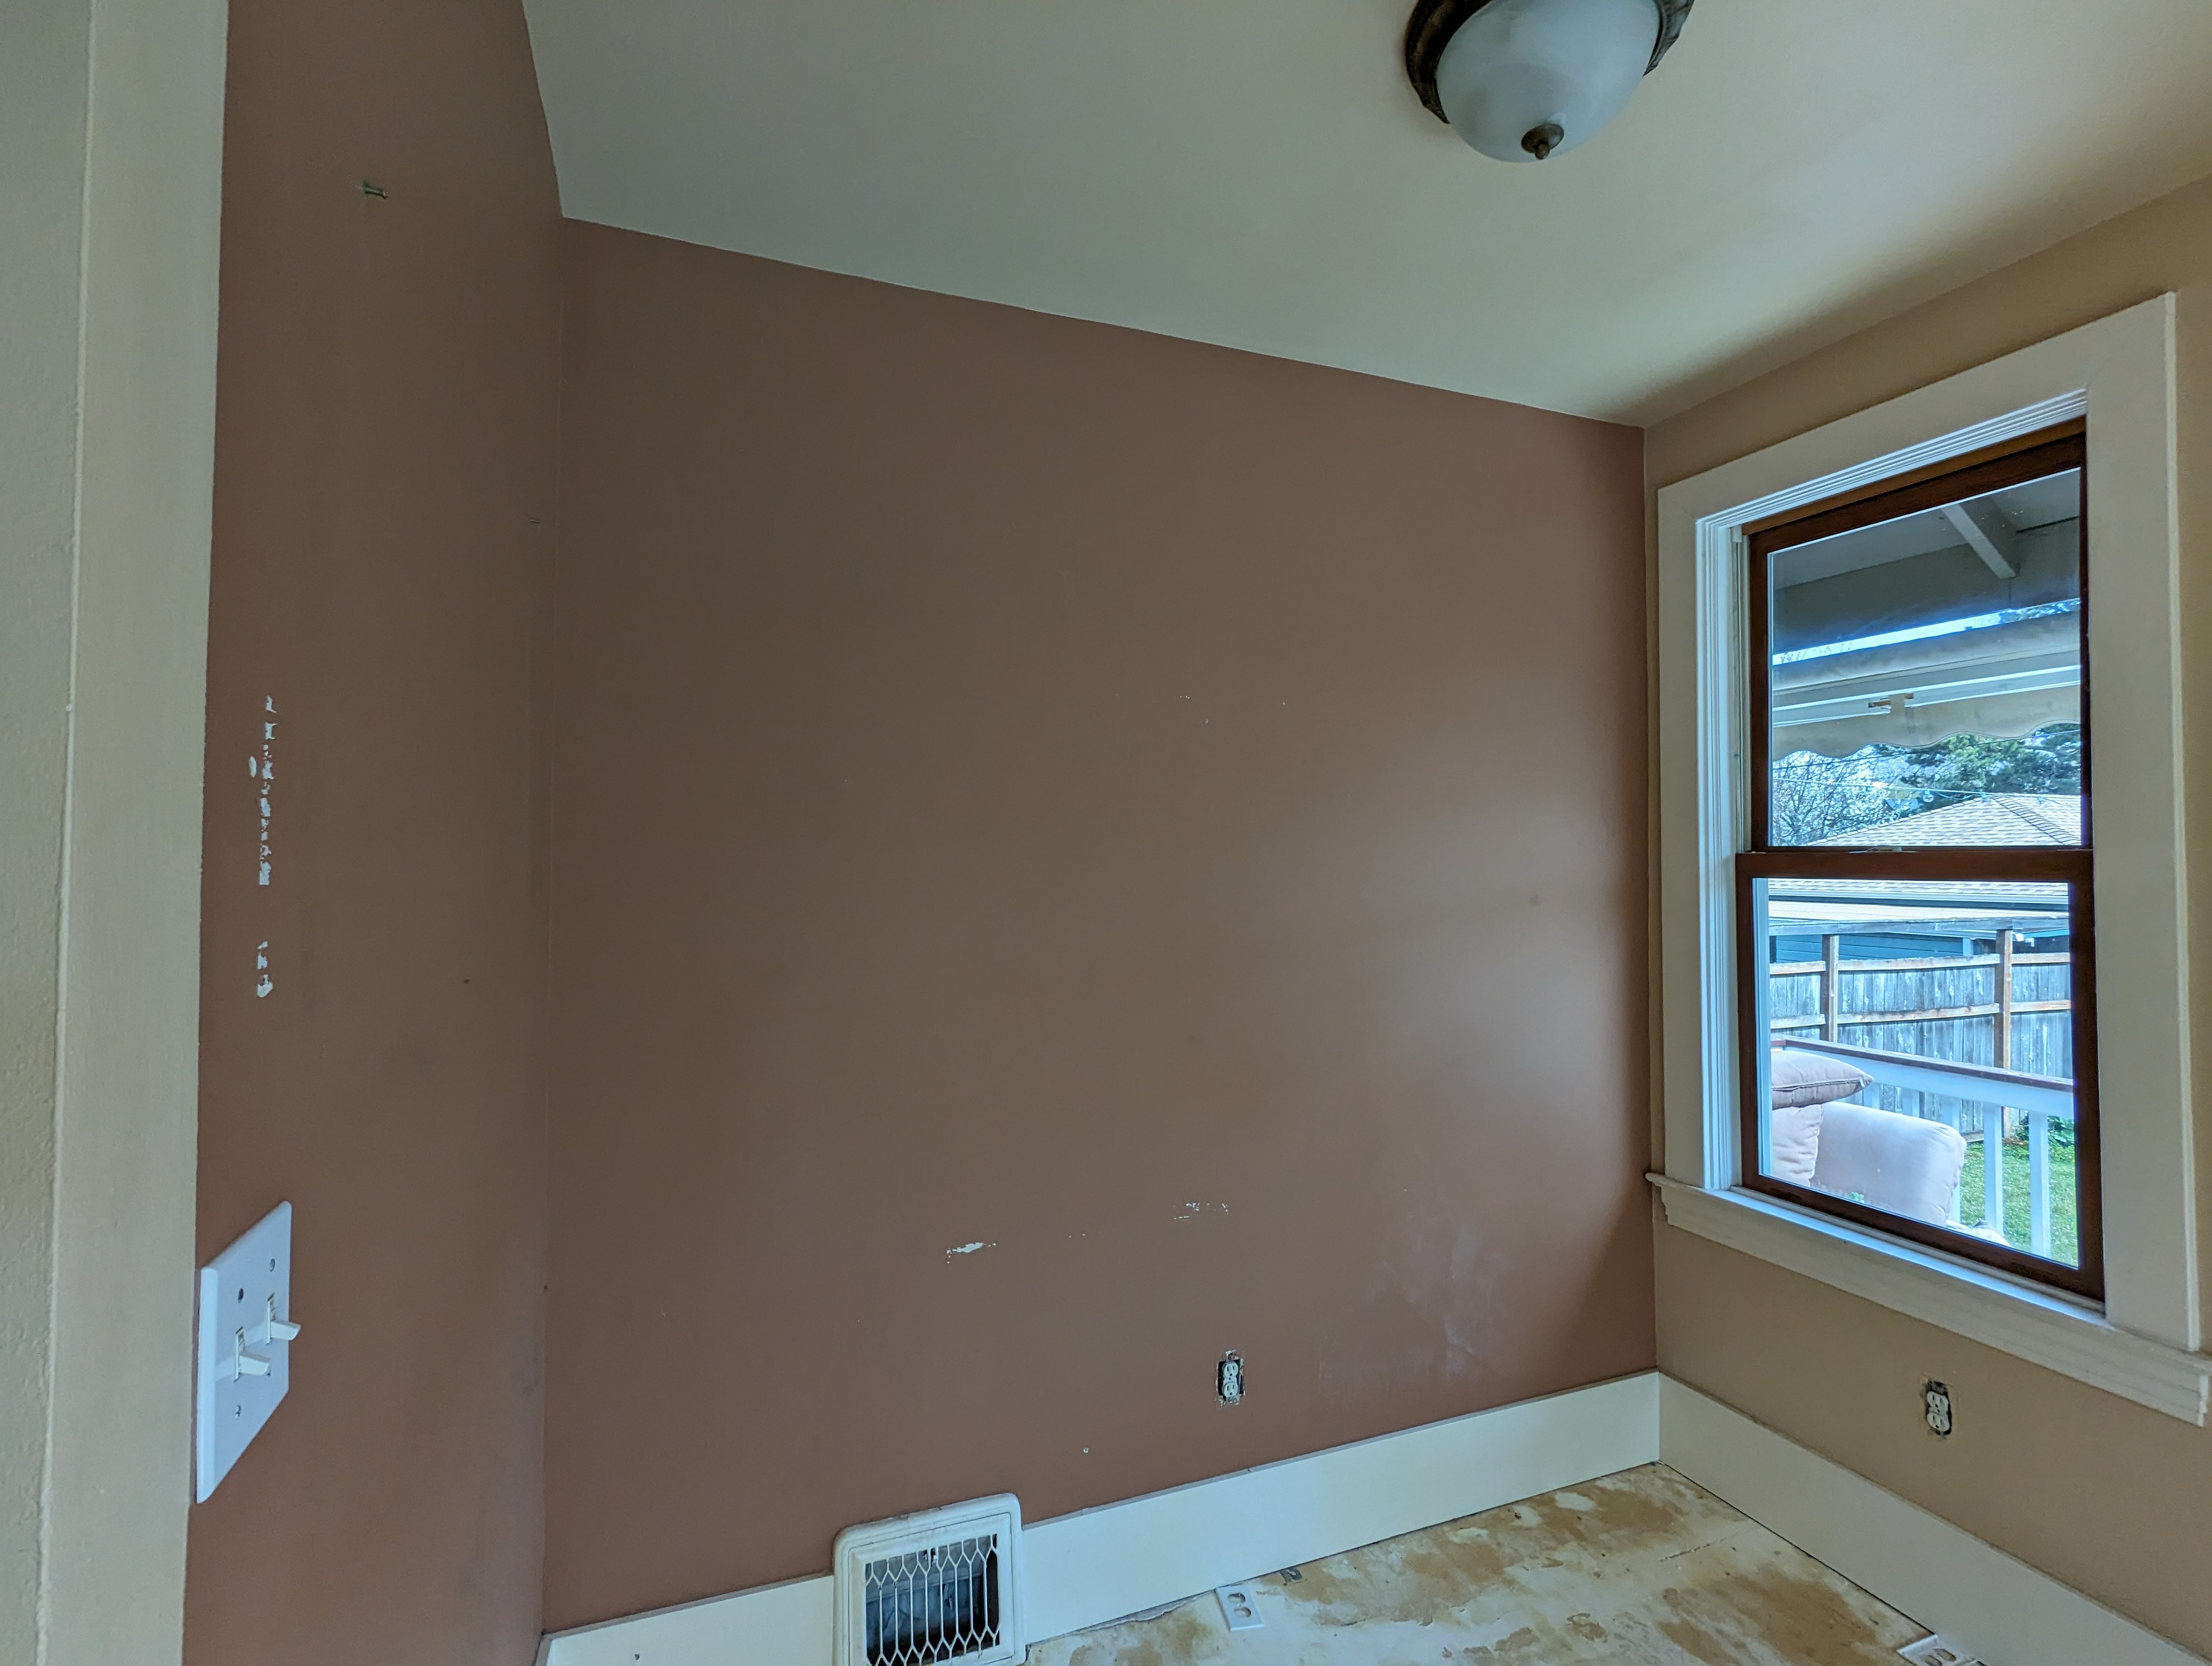 Post-demo nook
There’s a pair of heating vents in the nook. These had to be routed through the built-in bench. An air return would have been more complicated, but these are both outflow. They routed those three electrical outlets underneath the seats too.
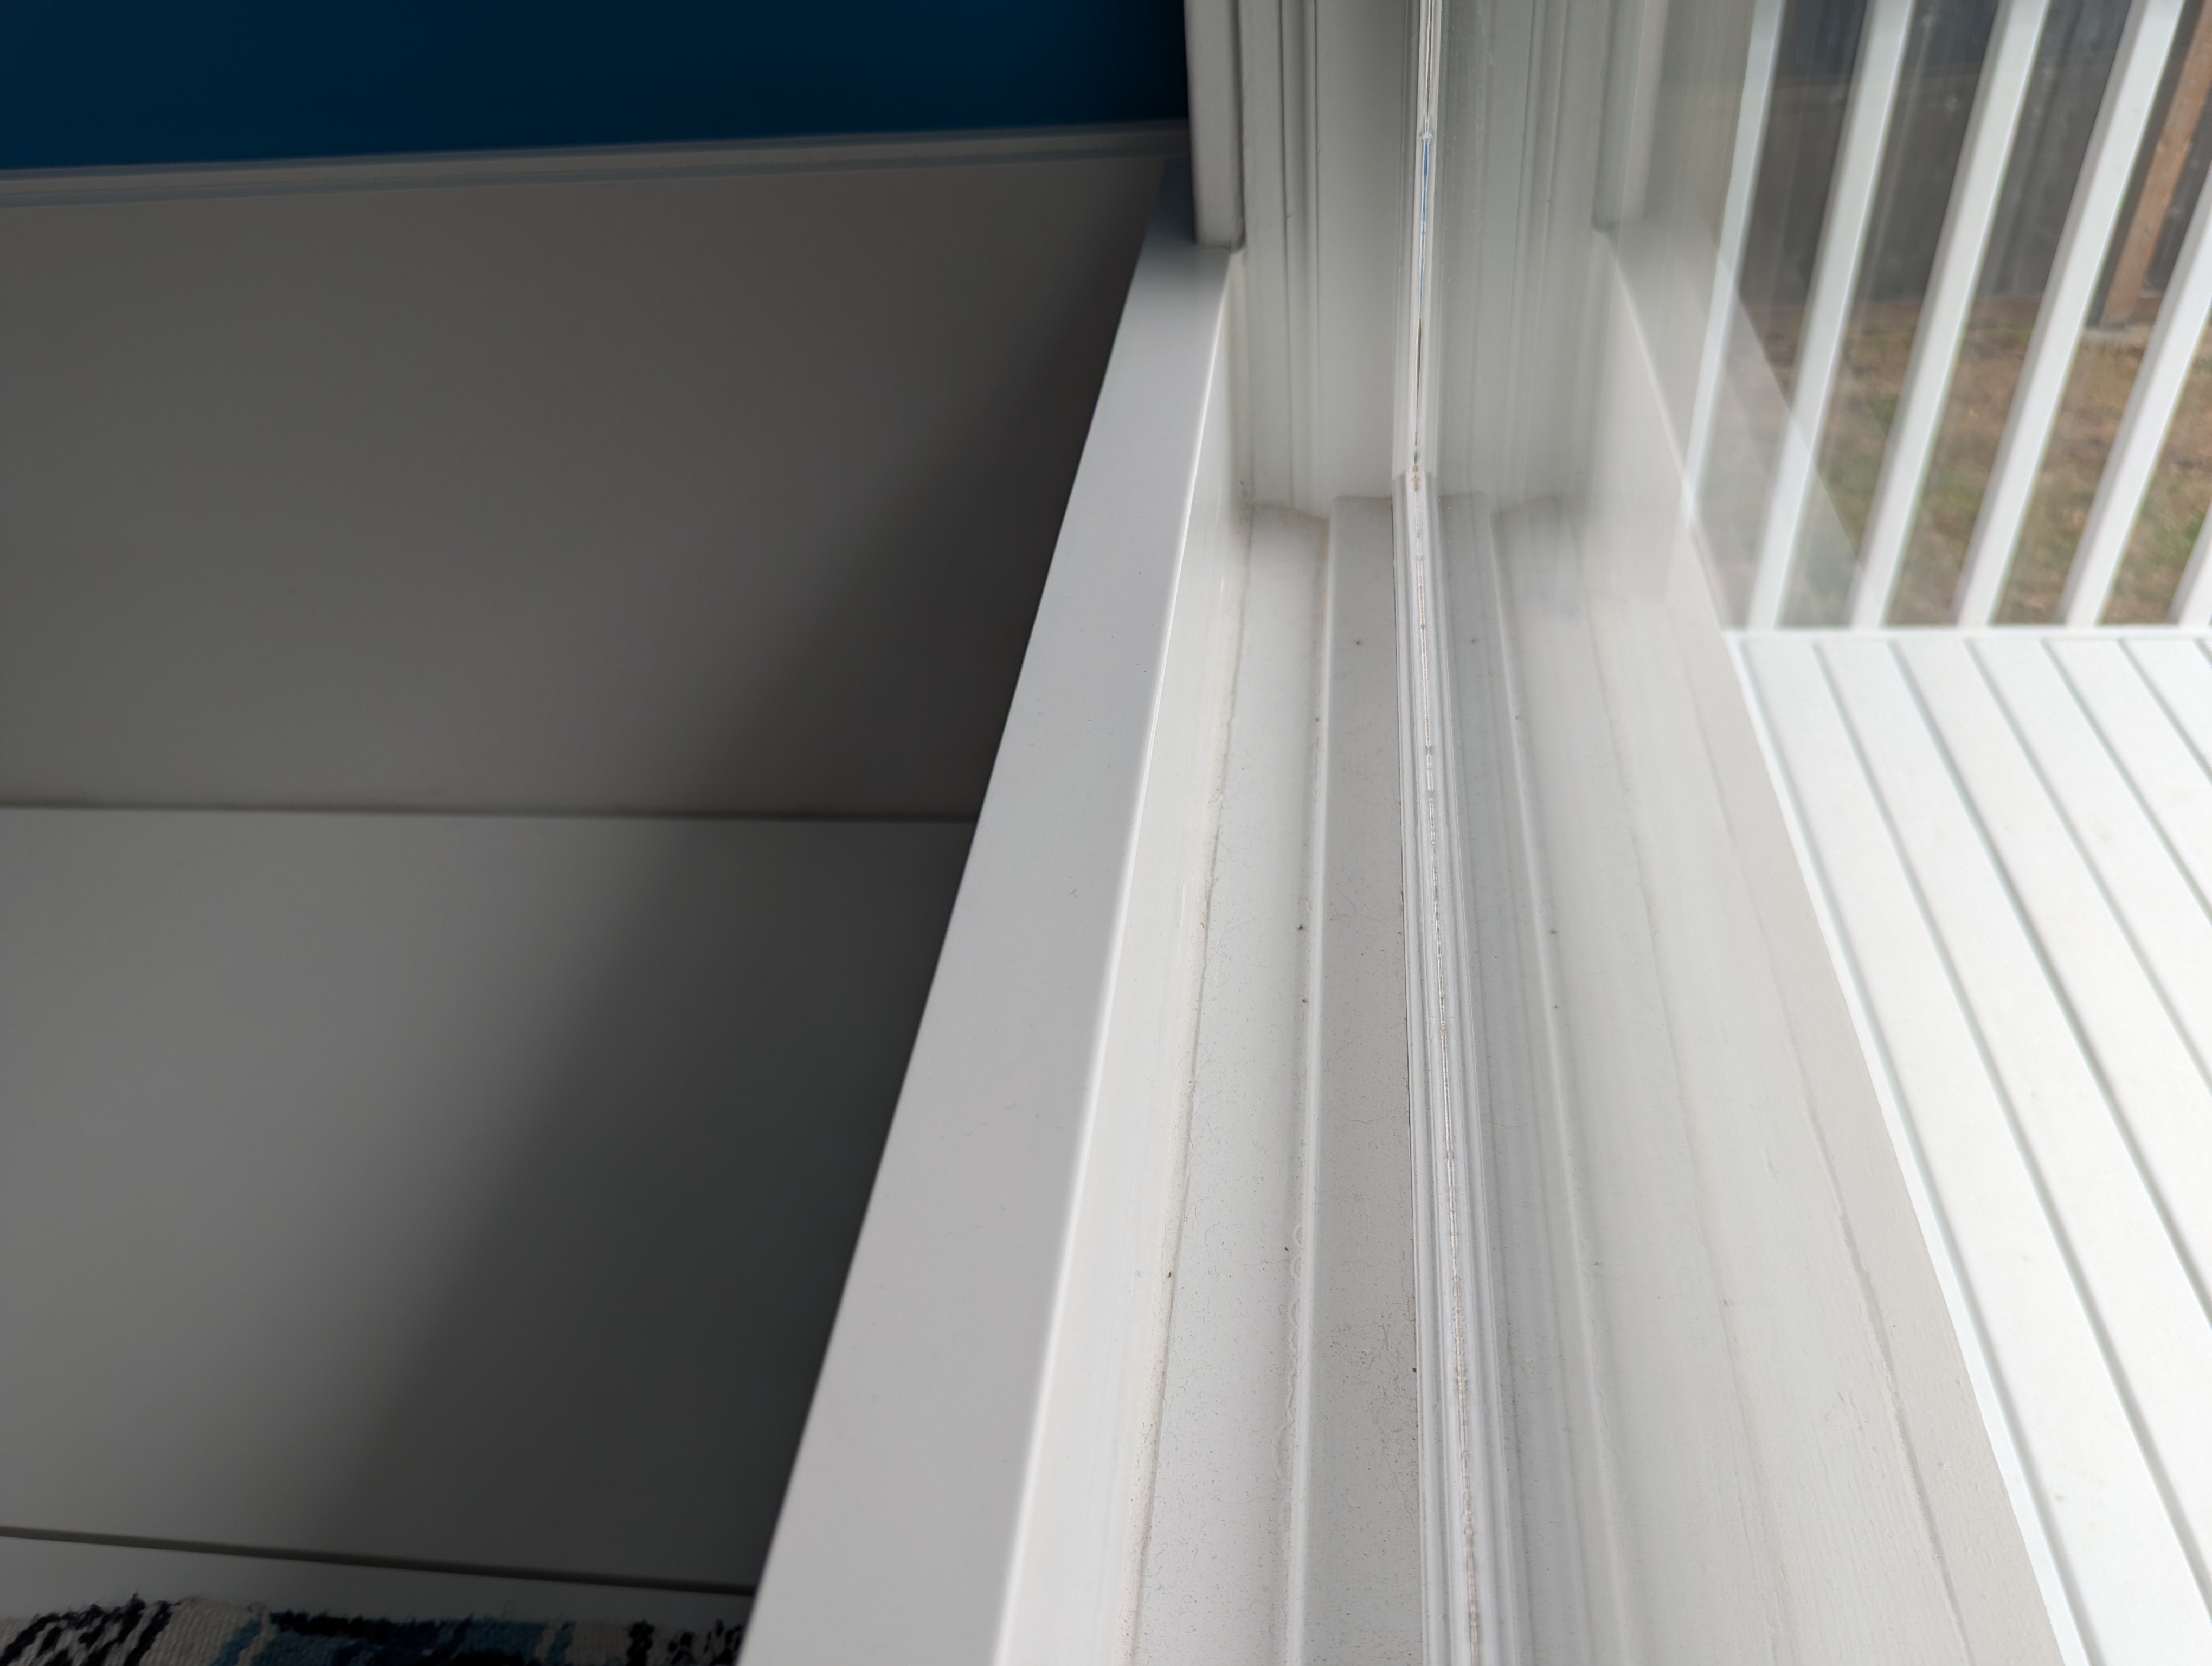 The nook bench back covers part of this window
The nook built-in covers the bottom 3-4” of the window. We can still easily open and close the window. LCM had an alternate design with a much lower back that did not block the window. That seemed uncomfortable to sit in. I think this way it adds a little bit of character to a house that’s almost 120 years old.
Issues
Unsurprisingly, a few issues popped up along the way. Some were our fault, some were LCM’s fault, and some were just natural stuff that comes up. We’re happy with all the outcomes. I just want to call out the worst along with the best.
First, we’re really pleased with both the final cost compared to estimate (about 8% more) and timeline (~1 week extra). As mentioned earlier, the last couple weeks were mostly touch-ups, so we were able to mostly move back in and start using the kitchen on-schedule. The extra cost came taxes not being included on some parts of the estimate, extra tile work (see below), extra painting (see below), and a handful of extra things we added in (e.g. new LED lights for the cans, some extra trim on the built-in). I think most of the issues that came up LCM fixed at no charge to us, even though at least one was due to us changing our minds after the fact.
Leaky Plumbing
We went from a two-basin sink to a single basin sink. The junction for the two drains was behind the wall, so Joe had to open up the drywall and do some plumbing there to get rid of the junction and replace it for the single drain. He walked us through what he did and explained where all the piping went, especially the drain hose for the dishwasher, which I appreciated.
Unfortunately, after closing it all up, we ended up with a leak into the basement because of the joint in the wall. Marius had a plumber come out the next day; he found the issue right away and fixed it in probably an hour or two. No charge (of course).
One of the noticeable differentiators in working with LCM was that, when we noticed this leak, we were confident LCM would a) make it right and b) take responsibility (if it was indeed related to their work); unlike when you don’t really trust a contractor and your first instinct is, Oh great, they’re gonna try to say this isn’t their fault and it’s gonna become a hassle. LCM struck us as very honest and responsible throughout the project.
“Random” Tile Pattern
The tile backsplash is this “random” pattern of blue and white tiles… but “random” turns out to be fairly subjective. We told the tile guy we wanted 20% blue tiles in a random pattern. We had a little bit of back and forth about the layout, but didn’t give him a specific drawing of where each tile should go.
After the tile got laid, I kind of freaked out. I didn’t like how much blue there was and there were a couple of spots that just did not look right to me. It technically was 20% blue, and it was a random pattern. Marius actually texted me that he was worried about the look of the layout at this point too. My wife talked me down, drew up a specific layout, and the next day we gave it to the tile guy who happily popped off a handful of tiles and relaid them. This ended up being an extra $600 or so and an extra day of work — money well spent.
Ceiling Imperfections
Our ceiling is plaster, or at least has a texture sprayed on it, and that ended up having some finish issues that needed fixing when painting. The painter was super friendly and surprisingly helpful, but spoke no English. Fortunately my wife speaks fairly good Spanish and between that and hand gestures we ended up figuring out the issue and agreed to have him do the extra work to patch the finish.
It wasn’t a big deal, but it did add a day of work and probably a few hundred dollars of work/materials, which didn’t get itemized in our bill. Once again, we appreciated that he brought the issue to our attention and let us choose between saving time/money vs. having a nicer outcome, and that he cared about the quality of his work; someone else could have easily just done the quick job and never mentioned it to us.
The Spice Rack vs the Microwave
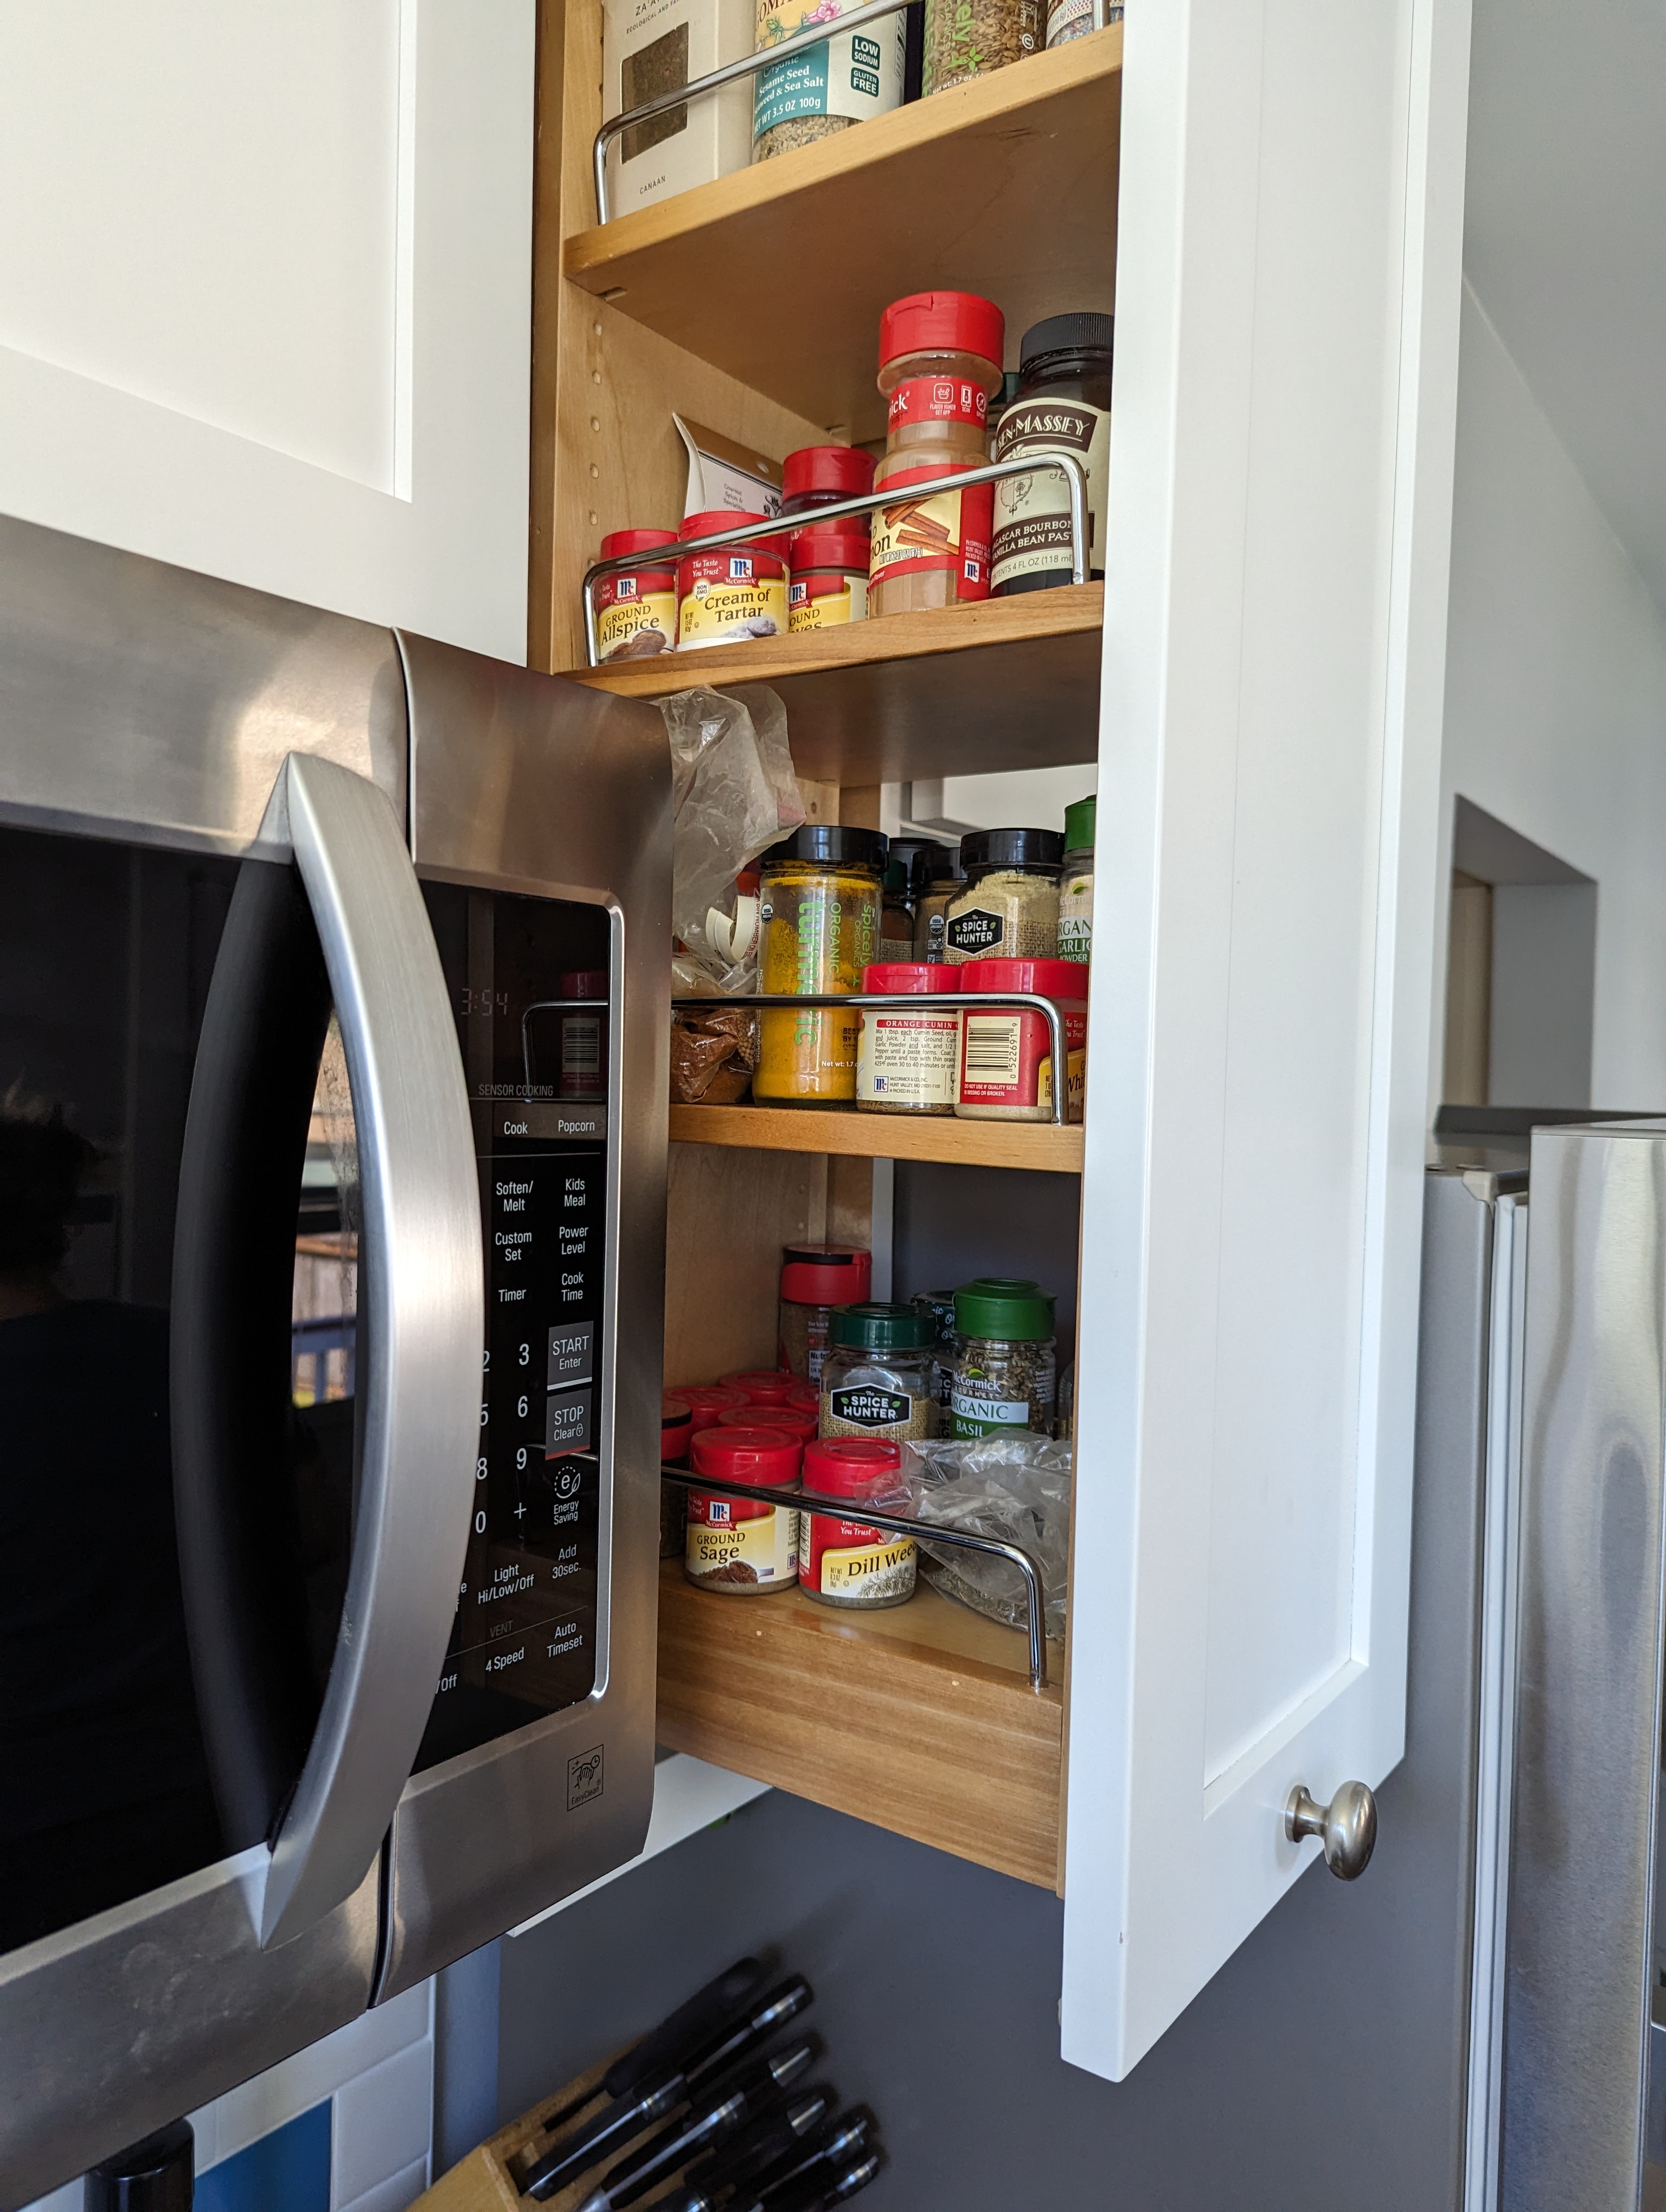 The spice rack was blocked by the fridge on one side and the microwave on the other
We chose to install a pull-out spice rack between the microwave and the fridge. This seemed like a good idea at the time. However, with the fridge along one side you could really only access the spice rack from one side and it was a bit awkward. Then it turned out that the microwave, which initially got installed flush with the cabinets, was binding when it opened (see pic below). This meant the microwave had to be remounted and pulled forward by about two inches. This wasn’t ideal aesthetically, and also made the spice rack even harder to access. Joe came back, reinstalled the microwave and, after a couple of weeks at the cabinet shop, removed the spice rack and installed a standard cabinet door and shelves. No charge.
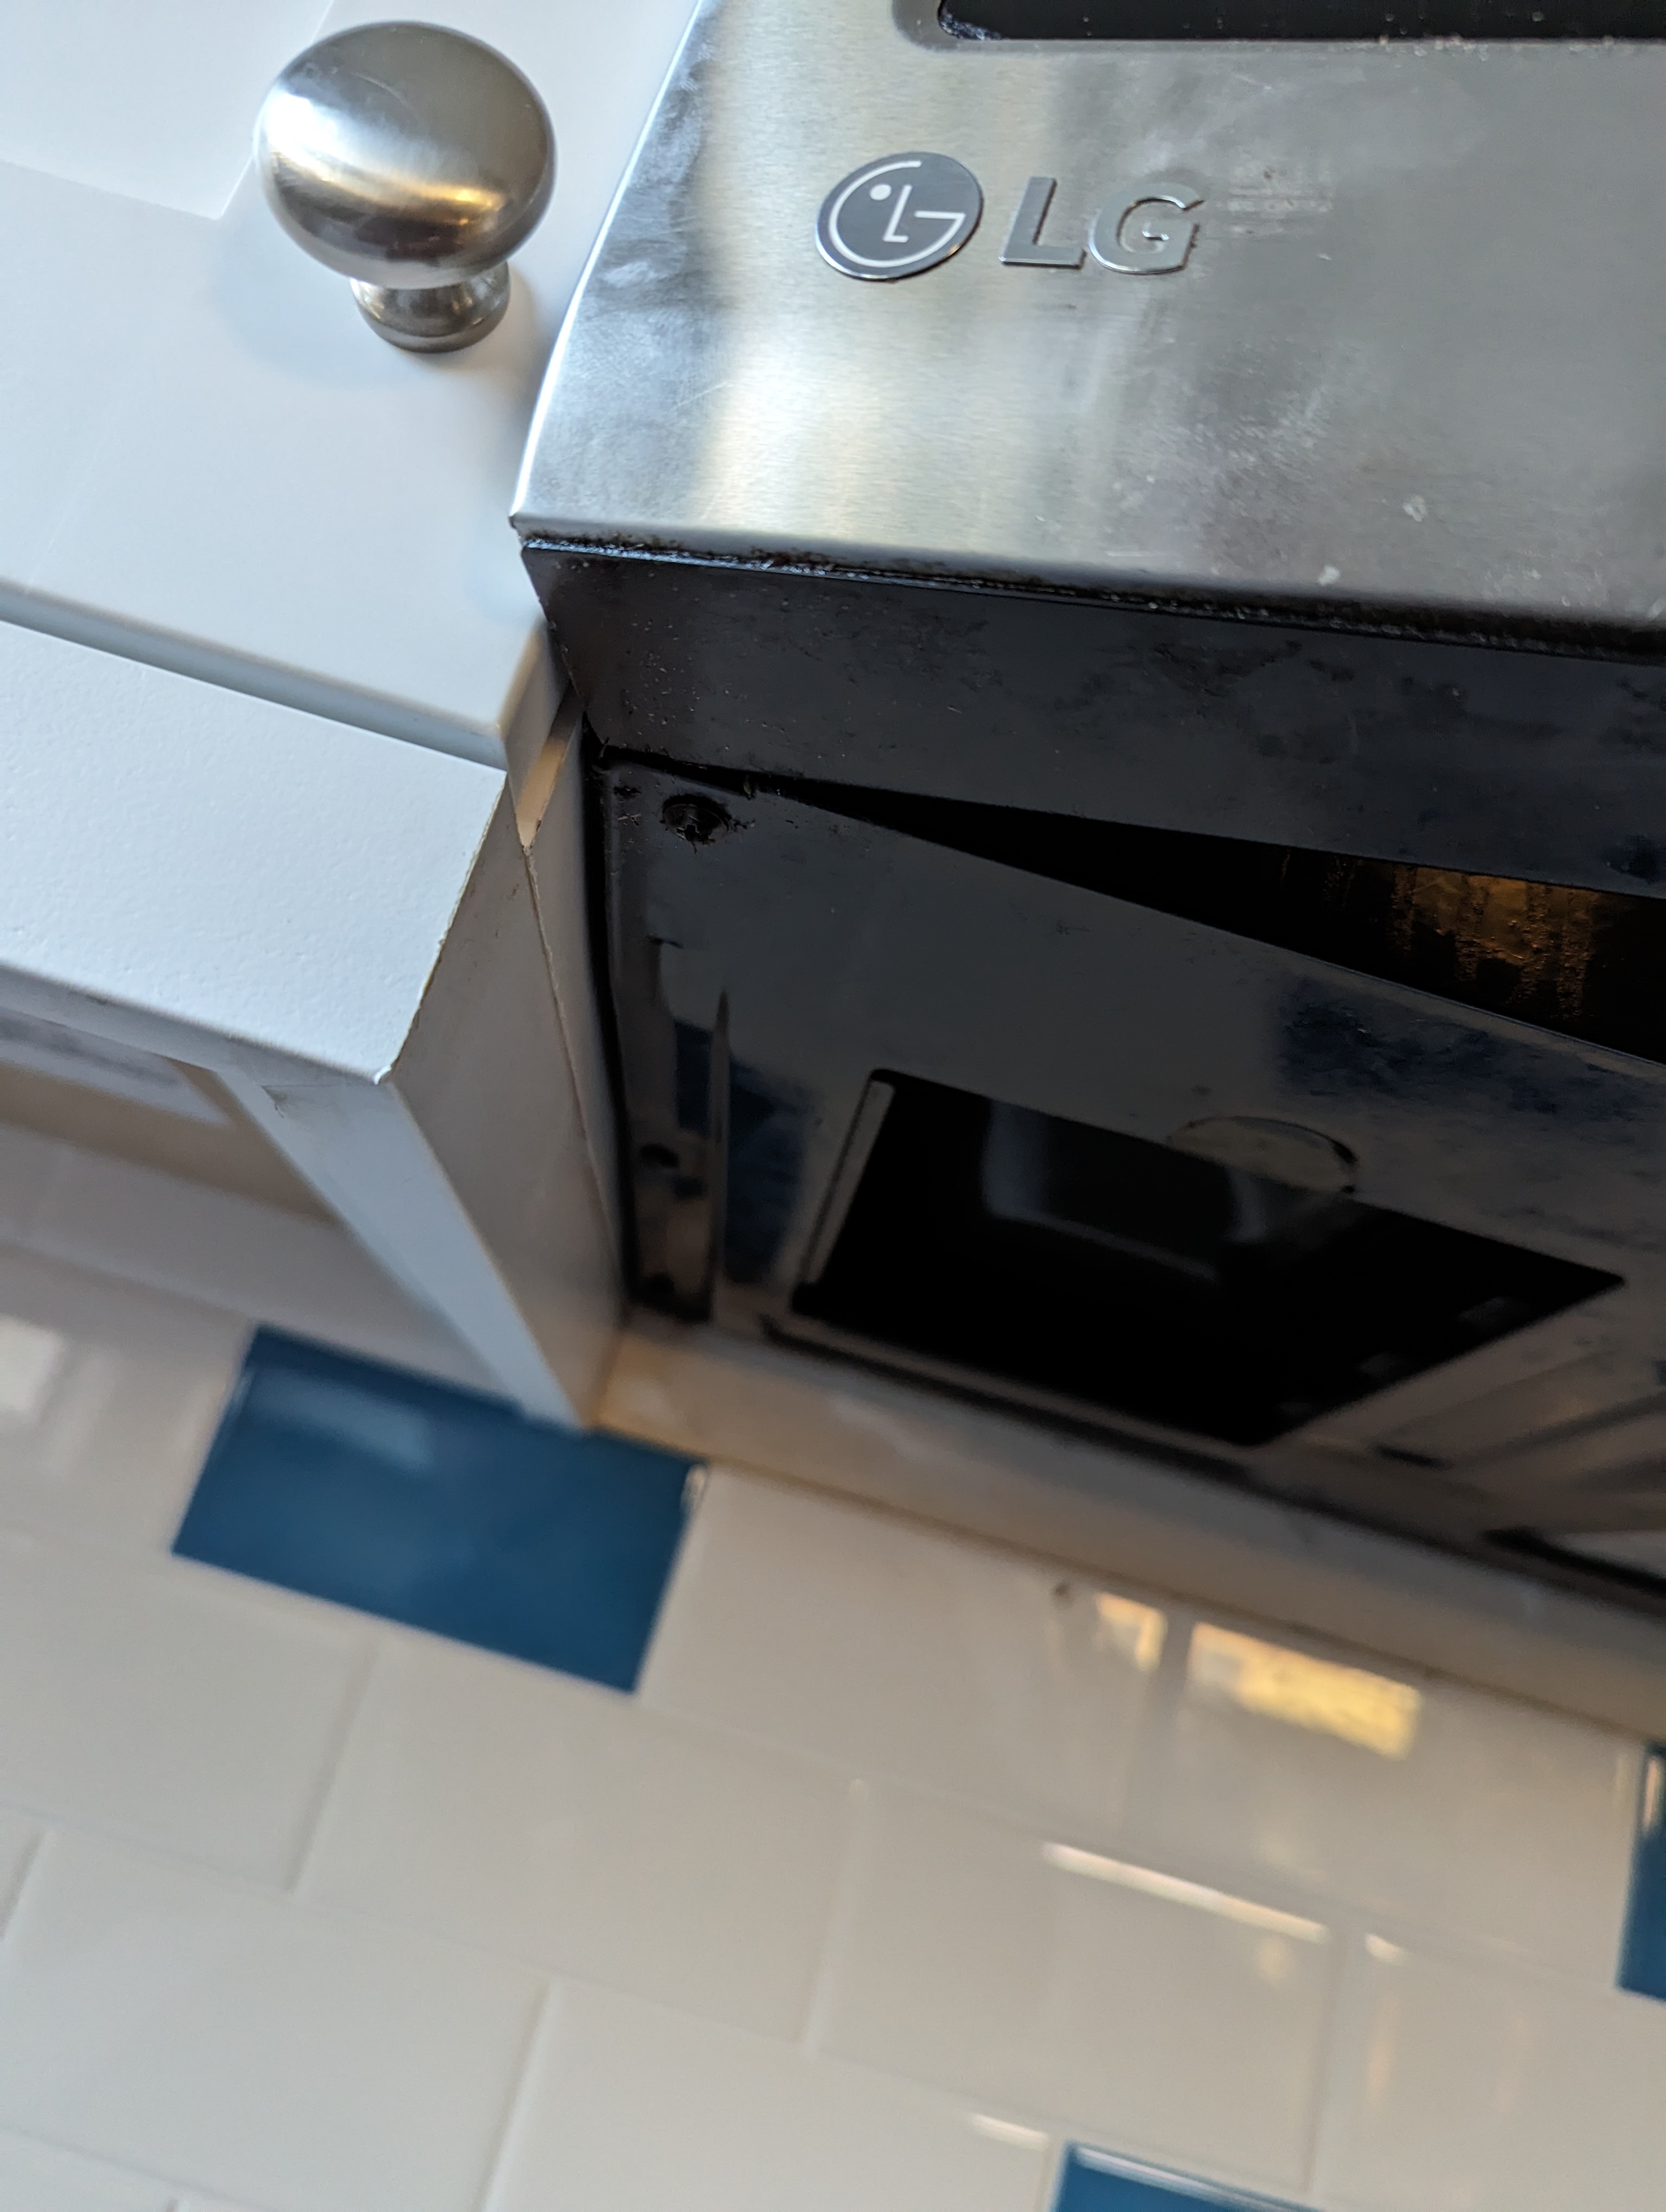 The microwave door was binding on the cabinet to the left so it could not be fully opened
Comically Short Pullouts
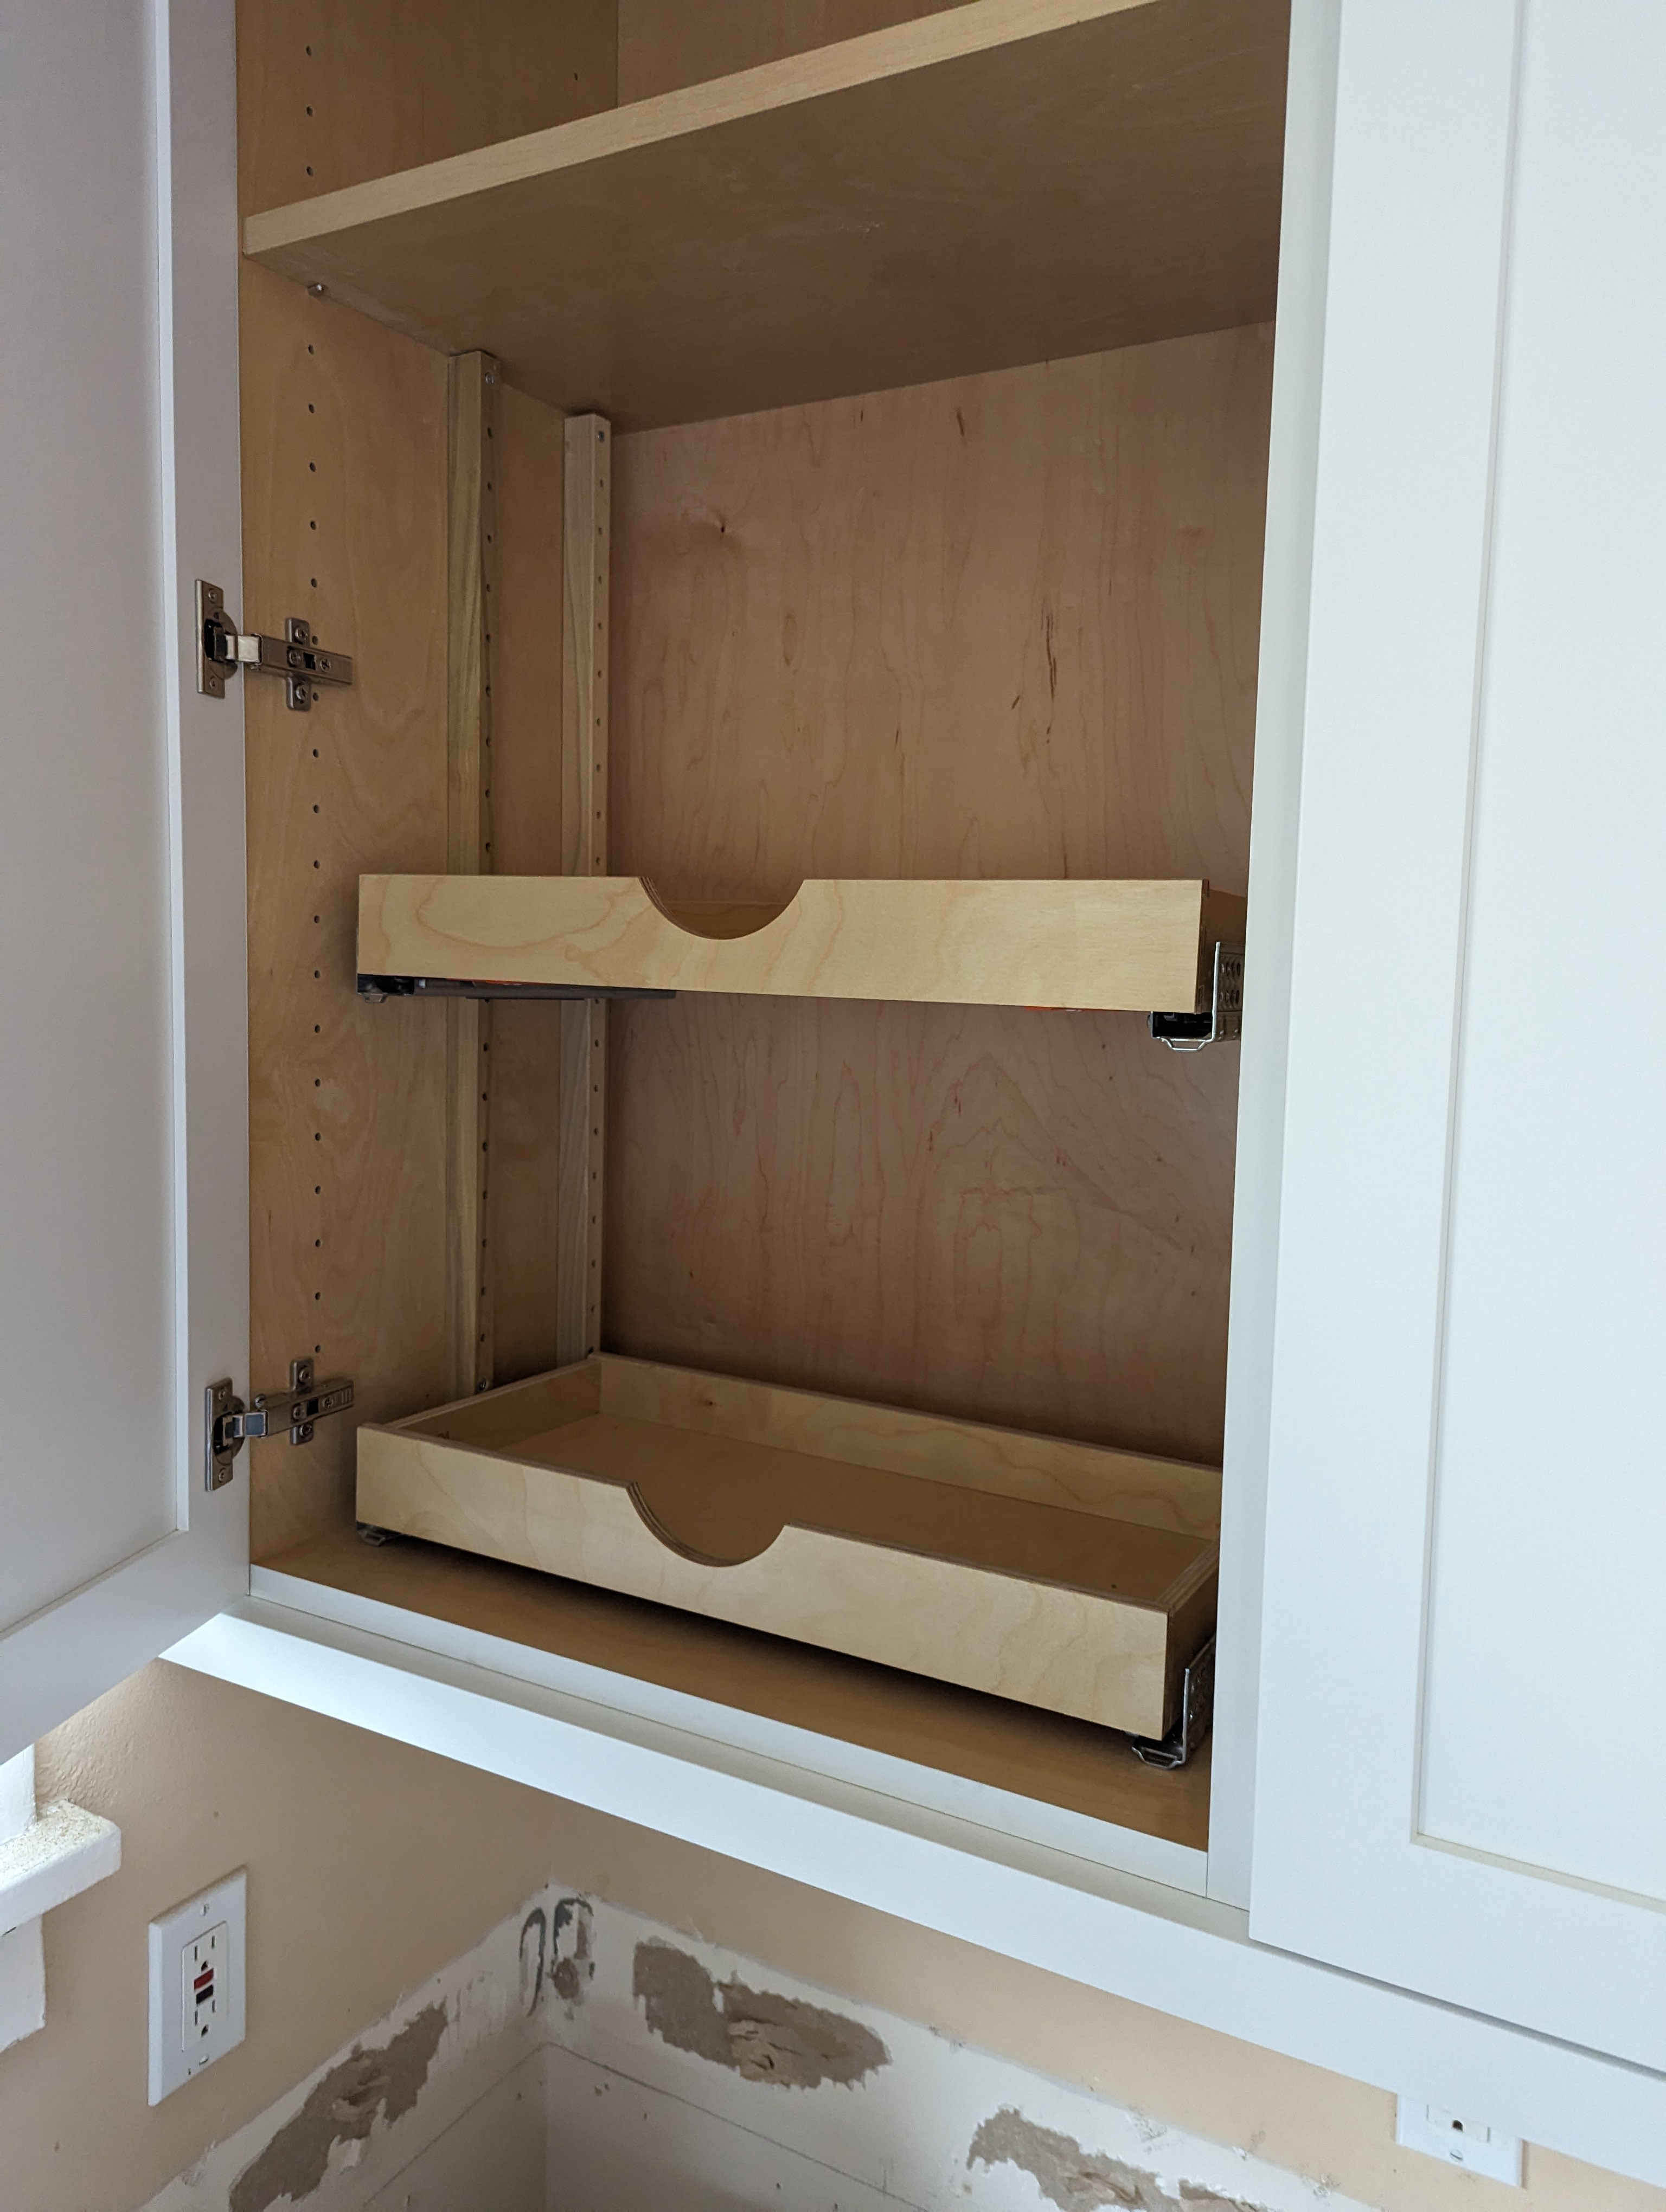 These pullouts left about 4 inches of unusable space in this cabinet
The pullout shelves in the top cabinet to the left of the microwave were initially too short — a really poor use of space. I took a picture, sent it to Kalia and she immediately agreed. We had a replacement in about a week during construction. Pullouts were also missing from the bottom cabinet to the left of the sink, although they’d been included in the blueprints. I took a picture, sent to Kalia, and we had that fixed in about a week during construction. No pushback and no extra charge for any of it.
Delaminating Flooring
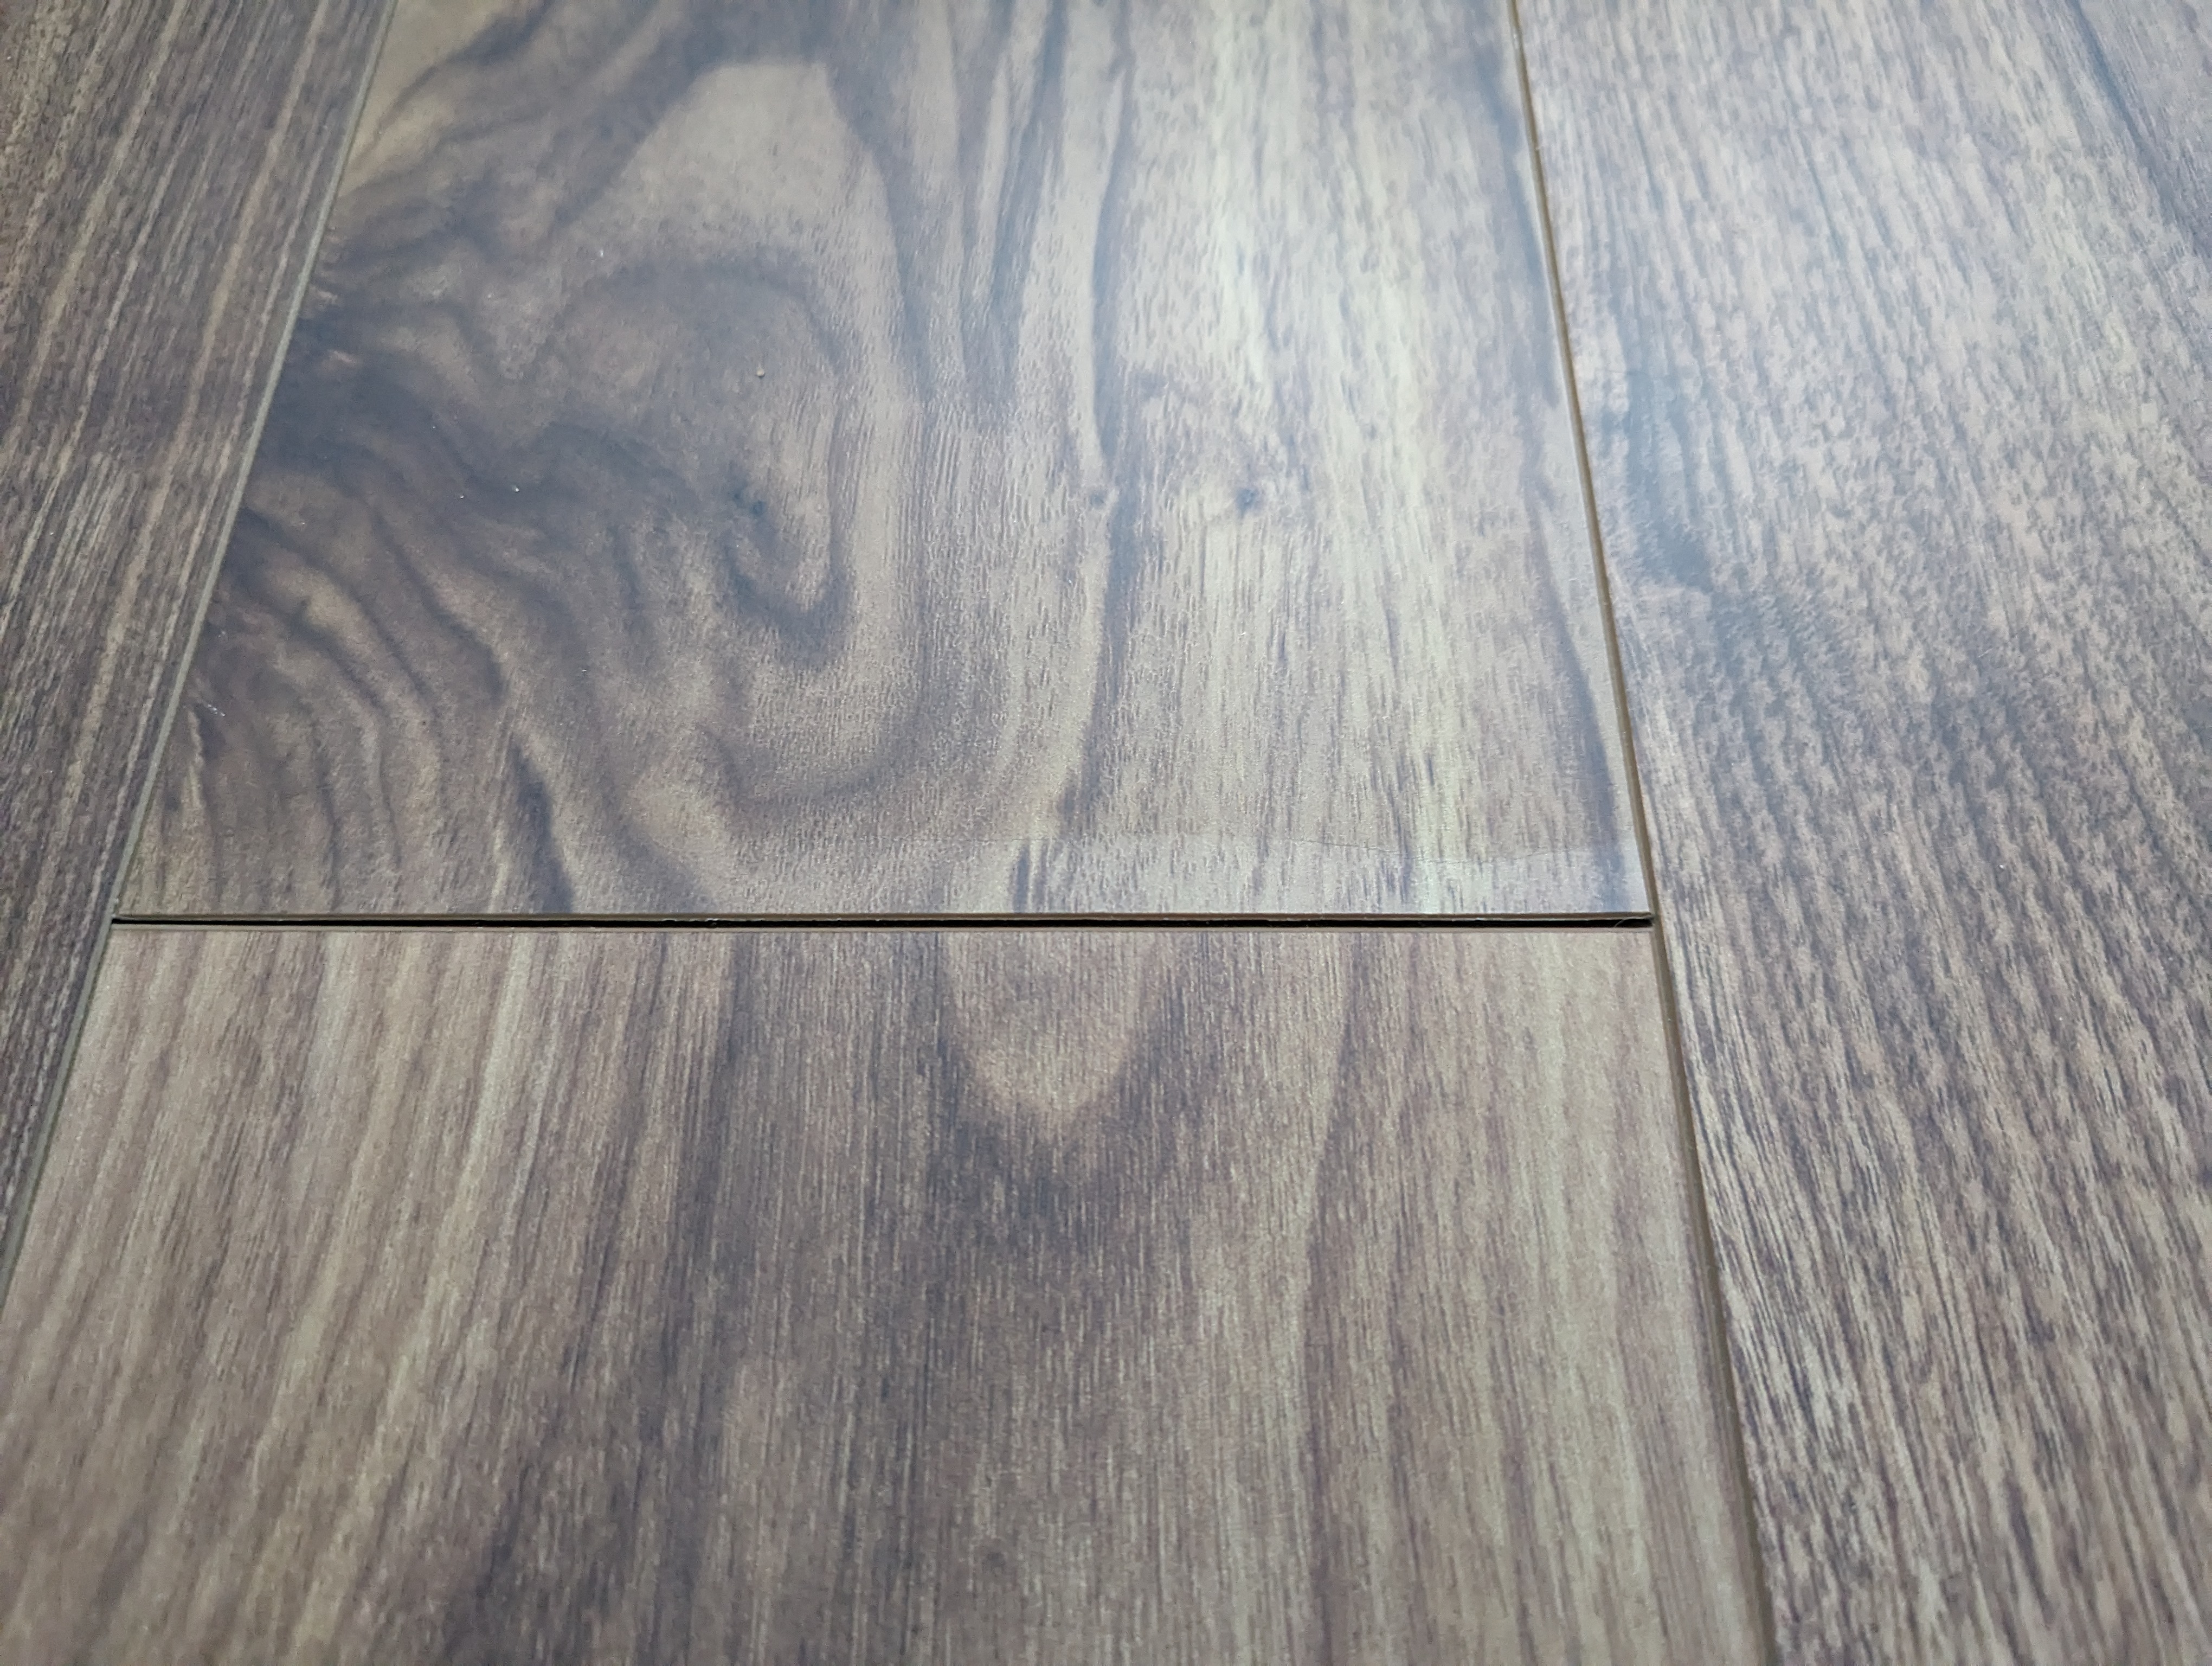 A couple of spots in the flooring were delaminating at the edges
The flooring started to delaminate in a couple of places. Joe came back, inspected it and decided it was defective or had gotten wet at some point before installation or something. Marius worked with the supplier to get a replacement. Marius made sure not to change the trim finishing after the replacement too, which was a relief. It took a couple of extra weeks after we were moved into the kitchen to get resolved. No charge.
What I Would Do Differently
It’s only been a month since the project completed, but so far there’s not a lot I would have done differently.
I might have added a shelf along the back side of the built-in with electrical outlets on it, in addition to the outlets underneath the seats. We used to stick an Alexa and a radio on the table by the north wall and that’s tricky now with the bench.
I might advise us not to get so carried away with all the fancy internal cabinet hardware/options. LCM can install basically any Rev-A-Shelf product, and when you’re in the planning phase it’s easy to think you want a customized pull-out for everything; that’s how we ended up with the “cloud” shelf, the spice rack and a trash can that rolls out from under the sink on little tracks. I dunno if we need all that, but now we’ve got it all.
I’m bummed the microwave sticks out a couple inches from the face of the cabinets. It looked so nice when it was flush. Maybe there’s some alternative microwave we could have bought (going back in time) with a different hinge that wouldn’t have bound up; but hindsight is 20/20.
Conclusion
We’re extremely happy with the result. Sitting in our breakfast nook is a delight every morning. With the new padding and LVP flooring, the floor is a little softer to stand on, so cooking is a joy. The brighter color scheme opens things up so much. The kitchen feels maybe 25% bigger, but I think it’s actually slightly less open floor space. The solid countertop makes me so happy. Sometimes I just run my hands across it and marvel. I love the blue accents. My wife is having fun picking out matching towels, door mat, seat cushions and even pot holders.
HOC was helpful. LCM was great. Marius, Kalia, Joe and all the craftspeople were friendly, helpful, and paid attention to detail. A good friend of ours was remodeling her kitchen at the same time and had a lot of frustration because her craftspeople were sloppy about the details; it really makes both the finished experience better, obviously, but also the process, if the workers themselves pay attention to fit and finish instead of you having to follow them around and nit-pick everything they missed.
Each day on site was fun. The only day I was down on the project was after the first round of tiles, and that only lasted 24 hours before I was psyched again. We ended up with exactly what we wanted. We’ll probably never get the money back, but we plan to live here for at least another 15 years, if not longer, so I think that’s money well spent.